Community
Welcome to the Visionary Wild Blog, featuring essays and video on photography and travel, special offers from our sponsors, upcoming events, and news from our instructors. We invite you to share your comments by clicking the post heading and entering your thoughts in the comment box at the bottom of the post page. The Share This button associated with each blog post enables sharing via Facebook, Twitter, and other social media sites.
Headed to the Himalaya? Tips for High Elevation Travel
By Justin Black
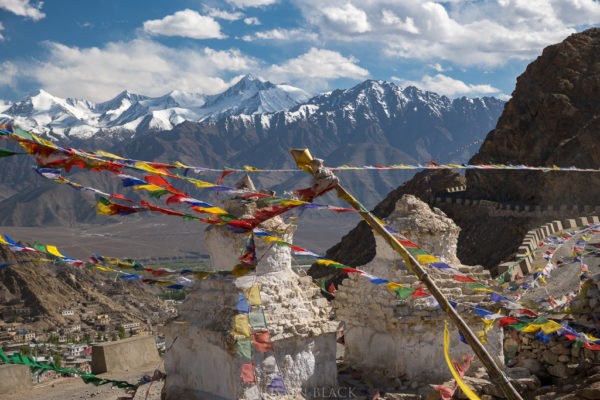
Prayer flags at Tsemo Gompa (12,000 ft.), with Stok Kangri peak (20,187 ft.) in the distance, Leh, Ladakh, India. Photo © 2017 Justin Black
One of the first things people ask when they see that we are going to 17,585 feet elevation on our June 2018 trip to Ladakh in the Indian Himalaya is, “How do you deal with the elevation?” It raises a serious issue, but one with which we have successfully dealt on past travels. First of all, to a person who knows from prior experience that they are predisposed to have serious physiological problems at high elevations, I would say that this isn’t the trip for them. Second, to someone who’s never before spent a few days over 10,000 feet, I would suggest making such a trip closer to home before committing to a visit to the Himalaya. Unusual sensitivity to high elevation has surprisingly little to do with age, sex, fitness, or how “tough” a person is. It just depends on the individual.
In our experience, however, we have found that most people tolerate well the elevations at which we will be traveling, so long as they take it easy the first couple days over 10,000 feet, stay hydrated, reduce or eliminate alcohol consumption, manage minor symptoms such as a bit of a headache, ascend to higher elevations during excursions by vehicle but sleep lower, and gradually increase elevations visited over the course of the itinerary, rather than going straight to the highest point.
Where you sleep makes a difference. On the high-elevation portion of the trip, we fly from Delhi directly to Ladakh’s capital of Leh, which is at 11,500 feet elevation. From there, we actually descend to about 10,500 feet to the village of Nimmu, where we spend three nights. The remaining nights in Ladakh will mostly be between 10,000 and 11,500 feet, with one night at 14,000 feet at Pangong lake, late in the trip.
As we acclimate, we monitor everyone’s condition, help ensure that everyone is staying hydrated, and that any altitude sickness symptoms are recognized and addressed. We recommend that anyone concerned about the effects of elevation consider having the medication Diamox (acetazolamide) or at least a standard over-the-counter pain reliever like Ibuprofen or Naproxen on hand, though medication is usually unnecessary.
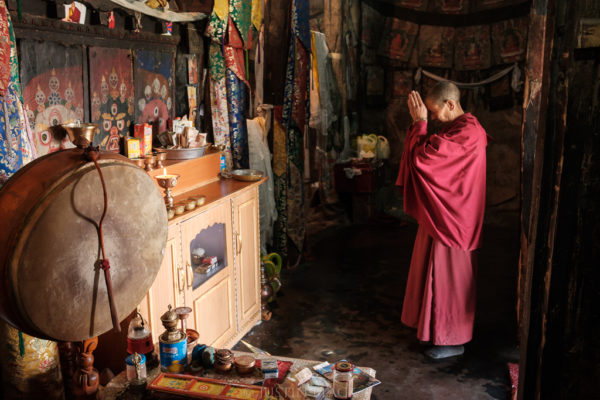
Buddhist nun praying in the Temple of the Protectors, Thikse Monastery, Ladakh, India.
By the time we travel by road over Khardung La (17,585 feet) en route to the Nubra Valley (about 10,000 feet), we will have been sleeping for four nights at between 10,500 and 11,500 feet, and making excursions to locations as high as 13,500 feet. We should be well acclimated to those elevations by then. As we will be traveling over Khardung La by vehicle, will only make a relatively short stop at the top of the pass (with the option to take a short and easy stroll on relatively flat terrain to photograph), and will be over 15,000 feet for no more than a couple of hours going over the pass, significant negative effects from the brief exposure to this elevation are highly unlikely. Well-acclimated participants on past trips have been pleasantly surprised to find that the high passes didn’t feel as high as they thought they would.
Just in case, we travel in Ladakh with a rather large oxygen bottle in one of our group vehicles in order to provide supplementary “O2” if needed. Plenty of drinking water is always on hand as well. At both high passes, medical facilities are maintained by the Indian Army that are well-equipped to handle cases of altitude sickness, in the unlikely event that anyone has an adverse reaction.
In summary, there’s a method to high elevation travel. By applying some simple principles, what appears intimidating can be surprisingly easy and comfortable. We anticipate that those who join us in Ladakh will have a very positive experience indeed.
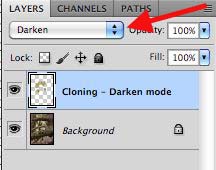
Photoshop Technique: Cloning in Darken Mode
By Charles Cramer

The Normal Lens
What is your “normal” lens? Have you ever determined if there is a single lens focal length that you naturally use more than others? It can be an enlightening exercise.
A 50mm lens on the 35mm film format is often referred to as “normal” because it renders a magnification and angle of view (about 40 degrees horizontally) that approximates the field that we can comfortably observe in some detail at a glance. It obviously isn’t meant to represent the breadth of our entire visual field (our binocular vision covers a field of about 114 degrees horizontally and our peripheral vision is much wider), nor does it represent the very narrow central area in which we see truly sharp focus at any given moment. You could think of it as a the “snapshot” field of view of human vision. It is also close to the 43mm theoretical ideal “normal” focal length for the 35mm format (also called “full-frame” in digital cameras), exhibiting neither telephoto compression of subject matter, nor does it expand the scene and visually push things away like a wide angle.
Many photographers find their own “normal” lens, whether it be Gary Winogrand’s 28mm wide-angle, Henri Cartier-Bresson’s 50mm, Sebastiao Salgado’s 60mm, or Tom Mangelsen’s 600mm.
Personally, I find that when I review the metadata of images I’ve made with my 24-70 zoom on Nikon FX format cameras, it seems the focal length I’m most comfortable with is 44mm. For whatever reason, I make far more images at 44mm than at any other focal length in the zoom range. This happens to be a single millimeter away from the true optically normal focal length for the 35mm format: 43mm.
This preferred field of view even extends to stitched compositions that I can’t even view through the viewfinder all at once. For a long time, I have used Nikon PC-E tilt-shift lenses to shoot three overlapping frames that are stitched together in processing, creating a higher resolution image about twice the resolution of the camera’s sensor. In the process, the field of view of my 24mm wide-angle PC-E becomes like a 16mm super-wide; the 45mm normal PC-E become more like a 30mm wide-angle; the short-telephoto 85mm PC-E becomes closer to a 50mm “normal” field of view. So, which PC-E lens do I use most for stitched compositions? Perhaps not surprisingly, I use the 85mm twice as much as the other two lenses combined.
It would seem that my preferred normal lens is really a normal lens, in the range of 44mm to 50mm, though yours may well be different.
–Justin Black
Nikon D5 Adds Automatic Focus Fine Tuning
by John Shaw
 Yes, I bought a D5 to use as my action/fast AF/high ISO camera. My D810 bodies will continue as my landscape/lower ISO cameras. I’ve had the new D5 all of two days now, but I’m already getting emails about one feature: how to use the automatic AF fine-tune. OK, so here goes…and to make it work you need to follow these steps precisely.
- You need a flat target with distinct high contrast printing.
- Mount your camera on a sturdy tripod, on a hard surface floor, with the target parallel to the camera back. Have the camera/target distance about 25 times the focal length of the lens you’re using.
- Turn off VR.
- Set the AF mode on the camera to AF-S.
- Have the Movie Record button set to None (in Custom Settings f1)
- In Custom Settings f2, set the multi-selector center button > shooting mode > reset > select center focus point.
- Turn on AF fine-tune in the Setup menu, with the default value at 0. Leave AF fine-tune turned on from now on.
- Turn on Live View (make sure the Live View selector switch is set to camera, not video), and select the center focus point by pressing the multi-selector center button.
- Autofocus on the target using either the shutter button or AF-ON button, and make sure the focus box in Live View turns green, indicating that focus has been achieved.
- Hold down the AF-mode selector and movie-record button simultaneously, and keep them pressed until a message appears on the LCD (this should appear in about two seconds). Make sure YES is highlighted, then press the OK button.
- When a second dialog message appears, press OK again.
That’s it. Easy. It took more time to write this out than to do the actual process.
And I now have two D4 camera bodies for sale. Both in great shape, will all the goodies from Nikon. Make me a reasonable offer for either (or both!).
“Hidden” Auto-Exposure
By John Shaw
Many current cameras have a “hidden” autoexposure feature, an option I use quite often when working wildlife. If your camera has ”auto ISO” buried someplace in the menus, you probably can use this feature.
Three choices control exposure: shutter speed, aperture, and ISO. We generally lock in two of these, and vary the third. In aperture priority you select the f/stop and ISO, and the camera sets the shutter speed. In shutter priority you select the shutter speed and ISO, and the camera sets the f/stop.
With most cameras it’s far easier to change shutter speed and/or aperture than it is to change ISO. After all, with both Nikon and Canon that’s what the command dials by themselves do as default behavior.
Look in your camera’s menus to see if you have “auto ISO.” If so, turn it on for this test. The way auto ISO normally works is that you set a minimum shutter speed and a maximum ISO value. So long as you’re shooting at that shutter speed or higher, the camera will vary the ISO needed for the situation. If the light level drops below this range one of two things happens: (a) in aperture priority the shutter speed continues to slow below your preferred minimum, while the highest ISO value is maintained, or (b) in shutter priority, once the aperture is wide open the camera underexposes, usually with some sort of viewfinder warning indicator, but still using the highest ISO.
But here’s the catch for bird and mammal work: setting a minimum shutter speed for wildlife means you’re probably going to choose a fast speed in order to stop any possible action. What if you intentionally want a slower speed? At the same time, at any given light level you don’t want to work at any higher ISO than necessary; you always want to use the lowest ISO you can get away with, given the situation. That fast minimum shutter speed you selected may force you to shoot at a high ISO even in good light.
OK, back to those three variables that control exposure. Reread that paragraph up above, and you’ll notice that I did not mention the manual exposure mode in which what you set is what you get. In this exposure mode you have to manually set both the shutter speed and the f/stop. Now here’s the kicker: if your camera has auto ISO, most likely you can use auto ISO while the camera is in manual mode, and let the camera vary the ISO needed for whatever shutter speed/aperture combination you select.
However — and this is a major “however” — you must know how to work in the manual mode. I’m always amazed at how many photographers today do not know how to do so. If you’re not sure, read my June 2015 blog post, and your camera’s manual, and practice.
So, switch to manual exposure mode, and turn on auto ISO. Set the highest ISO value to whatever maximum ISO you’re comfortable using with that camera. Set the camera itself to its lowest native ISO. For Nikon cameras, the “minimum shutter speed” choice in auto ISO does not apply when the camera is in manual mode (and I’m pretty sure this is also true for Canons, but not being a Canon user myself…).
What you have basically done is turn the manual exposure more into an autoexposure one. You select the f/stop and shutter speed you want, the camera sets the necessary ISO.
But how can you add or subtract the amount of light (for example, in order to reposition the histogram when shooting RAW) if the camera adjusts the ISO for any given shutter speed/aperture combination? Just as in any autoexposure mode, you use the camera’s autoexposure compensation. This does not affect the shutter speed or aperture you’ve set; after all, in manual mode what you set is what you get. Instead, it changes the ISO the camera selects. Dial in a +1 autoexposure compensation, and the camera raises the ISO by one stop; dial in a -1 compensation, and it drops the ISO by one stop. Since the camera is in manual mode, the shutter speed and aperture displayed in the viewfinder will not change, but there will be some sort of indicator that exposure compensation is in effect. You’ll have to pay attention to what you’re doing, and remember to return the compensation back to “zero” when no compensation is needed. If the light level drops so low that the camera maxes out ISO, your set exposure values will be too low. Just watch the meter display, which in this case will show underexposure.
Should you use this “auto ISO with manual” mode all the time? Heavens, no. As with all modes on your camera, you use what is appropriate to the situation. I personally find auto ISO in the manual mode extremely useful when I’m working wildlife.
LIGHTROOM AND TRAVEL
by John Shaw
How does one coordinate Lightroom used on a laptop when traveling, with a master Lightroom catalog back in the office? I’ve written about this before, but the topic keeps coming up at workshops and on tours, so….
I have one main master Lightroom catalog for all my images, which resides on my desktop computer in my office. That master catalog is on an internal drive (a different drive than the internal SSD drive I use for all my programs). A backup copy of this master catalog is made to another internal drive (automatically done by Lightroom when I exit the program), and a third copy of the catalog is on a small external USB drive. Yes, I’m a bit paranoid about loosing all that data.
I have another Lightroom catalog named Travel on my laptop. When I’m on the road, I download images using Lightroom, in the exact same format structure I use for the image files back in my office. As the files are downloaded, Lightroom automatically renames the files and adds my copyright information, using templates I’ve created in Lightroom. My naming template is a YYMMDD_camera-generated-file-name-and-numberformat, so individual files appear along the lines of 150624_D4S_4752. Nikon lets you set camera names in the menu system to a three character code, so my cameras are named D4S and D8T. Yeah, real original thinking there. Image files are always downloaded into a _Photos folder (the underscore makes it the topmost folder in my laptop’s directory), into a subfolder named by month and location of shoot. 06 Namibia would by a June trip to Namibia while 09 Denali would be a September shoot in Denali. Each day’s images are automatically sorted as Lightroom reads the file metadata, makes YYYY-MM-DD folders as needed inside the month-shoot folder (the 06 Namibia or 09 Denali folders), and puts the correct images into the correct folders (I always have my cameras set to the local time, which in turn means all images will be correctly sorted by date). Once all these parameters are checked in Lightroom they remain as set, so the only thing I ever have to change is the name of the month-shoot folder. I flag any images I work on in Lightroom, highlight those images, and save all metadata to file by doing Ctrl/Command + S.
While on the road I copy every day’s take to two small external USB powered hard drives, so that by the end of the trip I have three duplicate copies of all my images. Since the files are already in the organization I use in my office, all I have to do once I get home is to copy the image files to their correct location on my master hard drives, and to add the trip catalog to my master catalog. I open the Travel catalog on my laptop, select the folder with the trip images, and do File > Export as Catalog, saving the exported catalog on one of the small USB drives. I make sure to include the image previews. Since the image files on the USB drive are all current with the correct metadata saved to them, there is no reason for me to do what Lightroom calls Export negative files (“negative files” is Adobe-speak for the actual images).
Back in the office I plug this drive into a USB port on my desktop computer, and use my operating system to copy the image shoot folder, which has all the photos, over to the correct date location on my main hard drive array. Then I open my master Lightroom catalog, and do File > Import from Another Catalog, and select the catalog on the USB drive. When this is finished working, I disconnect the small USB drive, at which time Lightroom want to know where the files are located since the imported catalog still thinks they are back on my laptop. I point Lightroom to the correct image folder I’ve copied over, the 06 Namibia folder or whatever it is, and I’m done. The backup software on my desktop computer automatically kicks in, and backs up my new images.
When I’m positive that all is well with my desktop system, I remove all the photos from the Travel catalog on my laptop, so that I can reuse the catalog shell again with all my preferences still set. I reformat the USB drives, reset the time in my cameras, and I’m good-to-go on my next adventure.
Using Manual Exposure
By John Shaw
In my photography I use Aperture Priority metering most of the time. I take a shot, look at the histogram, and use Exposure Compensation (EC) to add or subtract light as needed. Yes, this works great most of the time…but most of the time does not mean all of the time. There are shooting situations where it is best to not use an autoexposure mode (aperture priority mode, shutter priority mode, or program mode). This means selecting both the shutter speed and the lens aperture; that is, using manual exposure mode. In this mode, you have to physically set both the shutter speed and the aperture, and the camera remains at those settings — and exposes at those settings — no matter where you aim the camera. What you set is what you get, period. EC does nothing to change the camera’s settings. It affects the meter readout, but it does not in any way change the shutter speed or aperture on the camera, so turn EC to zero. In manual exposure mode, what you set is what you get. If you want to lighten or darken the image, you have to physically change the shutter speed or the aperture or the ISO. The camera itself does not change anything. What you set is what you get.
This blog post comes about because of a photo trip I recently led. We were standing on the top of a cliff overlooking the ocean, preparing to photograph birds flying past. If they birds were above us, the background was a pale milky blue sky. If below us, the background was a dark navy blue ocean. So what’s the right exposure? Any autoexposure mode would be biased by which background was in the frame. One solution would have been to work only those birds against the pale sky, or only those against the dark ocean. But the birds were not cooperating in that manner. They would swoop around, at one moment be above us and the next moment be below us. When I mentioned that this situation called for a manually set exposure, to compensate for the different background tonalities, the response I got reminded me once again how many photographers have never used a camera in the manual exposure mode.
If the light remains the same, once you correctly set a manual exposure, it is correct for all subjects in that light regardless of their tonality. OK, but how to set that exposure? Pick something, it doesn’t matter what, in that constant light, and adjust for it’s tonality. When you set the camera to manual exposure, an analog display will appear in the viewfinder with a “zero” point in the middle of a “plus” and “minus” line. “Zero” is the starting point. Change the shutter speed and/or aperture until this mark in highlighted, and you have set the camera to render whatever you aimed it at to be rendered as a medium tone. Go to a “plus” mark, and you have added light. Go to a “minus” mark and you have taken away light. So, aim the camera at a single tone, and meter it and only it. Physically change the shutter speed and/or aperture to render that area at whatever tone you want it to appear. Here’s a quick and dirty way to think about this. At the “zero” mark the camera will render that subject you metered as a medium tone. At the “plus one” mark, one stop open, the metered subject will be rendered as a “light” tonality. At the “plus two” mark, two stops open, it will be rendered as a “very light” tonality. At the “minus one” mark, one stop down, it would be “dark” subject; at “minus two” it would be an “very dark” subject.
Suppose you meter a blue area. Here’s what would happen as you change the shutter speed/aperture combination:
+3, whitish blue
+2, very light blue
+1, light blue
0, medium blue
-1, dark blue
-2, very dark blue
-3, blackish blue
Back to those birds…. The solution would be to pick an easy area to meter: either the pale sky, or the dark ocean water. Let’s use the pale sky; it was roughly “very light blue.” Set the camera to manual exposure mode, aim it at the area of sky where the birds would be, and adjust shutter speed/aperture until the “plus two” mark was highlighted. It doesn’t matter what combination shutter speed/aperture you use to get started. Pick the equivalent combination that gives the shutter speed needed or the aperture needed. Suppose you aimed your camera at that sky and the exposure combination that yielded “plus two” was 1/125 sec. at f/11. Well, you know that 1/125 sec. is way to slow a shutter speed to freeze a bird in flight. 1/125 sec. at f/11 is exactly the same as 1/250 sec. f/8, or 1/500 sec. at f/5.6, or 1/1000 sec. at f/4, etc. Need a faster shutter speed? Raise the ISO one stop, and you could shoot at 1/2000 sec. at f/4 (or any equivalent combination). Set the shutter speed/aperture combination you want to use, and fire away. So long as those birds remain in the same light, and the light itself does not change, the exposure will be correct no matter the background.
I can think of a number of situations where using manual exposure would be best. Consider working a black sand beach, with waves breaking white over it. The camera meter would read a black subject at one moment, a white subject at another. Or imagine you’re using a zoom lens to photograph a dark buffalo standing in the snow in Yellowstone. As you zoom the lens, the image changes from primarily snow to primarily buffalo. Or a situation I faced back in February while photographing red-crowned cranes. The white cranes were standing in a snow-covered field, but as they took flight the background became leafless winter trees, a dark toned area, and then to medium blue sky as the birds rose higher. In all three situations, so long as the light remained unchanging, the solution was to meter one area, set the exposure using manual mode, and shoot away.
If you’re not familiar with the manual exposure mode, I would strongly suggest some practice. But let me add one final statement: with all digital cameras, you cannot evaluate exposure or color via the LCD on the back of the camera. The histogram is your friend, whether shooting manual mode or one of the autoexposure modes. Learn how to use manual exposure mode, and learn how to read the histograms.
Justin Black Interview with PhotographyTalk.com
In April 2015, Justin Black sat down with PhotographyTalk.com founder Alex Schult. Here’s the full interview.
Alex: Hi Justin, welcome to Photography Talk.
Justin: It’s a pleasure to be here, Alex.
Alex: I understand that 2015 marks your 20th year as a professional photographer. How does that feel?
Justin: Well, it’s been a wild ride, and I’m very fortunate to still be doing what I love.
What inspired you to become a photographer?
The power of the still image. It both communicates information and evokes emotion instantly, and it also invites inspection and interrogation over time. It allows us to look at the world in a way that we don’t directly experience. A photograph renders the fleeting moment eternal.
When I was in junior high school, I took a communications class called Media Arts. Among other things, we learned the basics of developing black & white film and making prints, which was magic to me. There’s still nothing quite like seeing an image emerge on a sheet of paper in the the glow of a darkroom safe light. I wish I had access to a traditional darkroom and the time it takes to use it, but I digress… After that, I became increasingly interested in photography and started devouring books and magazines on the subject and going to photography exhibits at the many art galleries in Washington, DC. At the same time, I was generally interested in art.
Early on, there were a few photographers whose work particularly got me excited about photography as an art form and as a career: Eliot Porter, André Kertész, Minor White, Wynn Bullock, Paul Strand, Ansel Adams, Cartier-Bresson, Galen Rowell, Frans Lanting, David Muench, and Jack Dykinga. I’ve since had the privilege of working and teaching with the last four of these.
Tell us about your first sale.
You mean besides photographing a friend’s Bar Mitzvah when I was thirteen? I don’t remember my very first photo sale after I started my career in 1995, but my first memorable photo license around that time was a picture of classic storefronts in downtown Mansfield, Ohio, that was used on Mastercard credit cards. That sale netted me about $7,000.
Fast forward to today, you run a very successful photography business, tell us how that started.
Well, I guess you could say it was what I call “the upward spiral” – one experience leading to the next, to the next; one supporting the other, until everything comes into alignment. Over the last two decades, my work has included being a landscape, travel, and wildlife photographer, a contributor of photo-text packages to publications, a stock photo licensing specialist, image archive manager, gallery curator, photo workshops director, photo business general manager, book editor, and the executive director of a global conservation photography NGO. Over the years, I’ve developed a following for my editioned prints, done both commercial and editorial photography on assignment, and licensed my work for publication and advertising. One area I’ve found that gives me the tremendous satisfaction, however, is creating exceptional learning and travel experiences for other passionate photographers.
In late 2010, I left my position as executive director of the International League of Conservation Photographers to create Visionary Wild, which is in some ways a continuation of the workshops program I rebuilt at Mountain Light Photography from 2002 to 2009, after the deaths of my friends Galen and Barbara Rowell, who perished in the crash of a chartered airplane. Of course, with Visionary Wild we’ve now gone way beyond what we were doing at Mountain Light, both in terms of international scope and quality.
What has been your proudest moment as a photographer?
That’s easy. Helping to save the pristine Flathead River Valley in southeast British Columbia from a massive mountain-top-removal coal mine that threatened to wreck the entire trans-border watershed. I collaborated with a great team of photographers on that project when I was at ILCP, and its very clear that our photos turned the tide in the conservation campaign to save the place.
Tell us about your book.
Both my photography and my writing have been published in several books, though I haven’t produced a monograph yet. I’ve edited and managed several photo book projects for Galen Rowell and the International League of Conservation Photographers. The ones I’m proudest of are Galen Rowell: A Retrospective (Sierra Club Books), and Freshwater: The Essence of Life (ILCP)
Tell us about time in your career where you failed at something and how did you pivot to overcome this?
Back in 1995, I was trying to get a contract to have my work represented by Pictor, a UK-based stock photo agency that I worked for as a picture researcher. I was a naïve kid, but I guess I had enough passion and raw talent that their creative director, a jolly Italian guy named Alberto Sciama, decided to give me a chance. He gave me a few rolls of film and a simple assignment to go out and make some marketable images.
When I brought him the results, he patiently looked them over with a loupe at a light table, and then said in a lilting Italian accent, “Justin, you are a lovely boy, but this is crap.” I knew it too. I learned three important lessons that day. The first was to set high standards for my work and to always push myself to do better. The second was to shoot what I love, rather than what I think other people want me to shoot. The third is that well-informed, forthright feedback on one’s work is immensely valuable, especially when it isn’t what we want to hear.
Have you had an “I’ve made it moment”?
I’ve had a few, I guess. The first was when Alberto actually gave me a contract to shoot for Pictor. That was a gateway to a steady, livable income from my photography, though it would only be another six years before Pictor went belly up because they couldn’t adapt fast enough to the new digital paradigm in the stock photo industry. In the bankruptcy chaos that followed, I lost most of the original film I had shot for them, so in the end it was a mixed blessing. Another high point was a few years later when some significant galleries started to exhibit my work. The most recent was when I realized that Visionary Wild was actually going to be a success.
How do you balance a demanding photography career and your family?
My wife, Lena, is the most wonderful, insightful, and supportive woman in the world, that’s how. Two years ago, our young son wasn’t very understanding of my travel schedule, but now, even at age five, he takes it in stride pretty well. I travel at least a third of the year, I miss them, and they miss me. It’s not a simple thing, but as you say, it’s about balance. When I’m home, I try to focus on family as much as I can.
If you could go back in time, what advice would you give to the 21 year old you?
Make pictures for yourself, not for the market. In other words, be true to your own vision, interests, and passions. In the 1990s, I spent a lot of time and resources making images that were designed to be highly salable in the stock photography market. They did sell, but most of that early work is totally irrelevant to me now because it isn’t representative of what I have to say and what I want to do with my photography. Thematically, my work has gone in a very different direction.
I’m a big believer in the notion that artists and communicators ought to aspire to find a market for the work that is true to them, rather than tailoring their work to fit the demands of the market. It’s important to understand the market, but it’s become clear to me over the years that photographs with meaning and longevity arise from the photographer having something to say and a unique vision to share, not from cynically engineering images for maximum payback.
Of course, most young aspiring photographers need some serious advice with regard to the fundamentals of operating a business, valuing their work, copyright management, etc., but I am lucky to have had a pretty good education in those areas very early on.
What is the best photography business advice you have been given.
It’s really just good business advice in general: “Be your brand.” In other words, your professional identity will ultimately become whatever it really is, not what you assert it to be or what you wish it were. For your brand to be what you want it to be, you have to live it and be authentic. Be honest, be reliable, don’t make promises you can’t keep, always put in the hard work to do the best job you can, and value what you do.
Another bit of advice is to make five-year and ten-year business plans, know your cost of doing business, and to price your work in a way that positions you to meet your goals for your business and your personal life. Learn to negotiate in such a way that communicates the value of your work, and don’t compete on price at the expense of the viability of your business or your long-term goals. Be willing to say “no” and walk away from bad deals – you’d be surprised how often I’ve had clients call back to accept a price quote after initially saying that they can’t afford it.
If you want to own a house or put your child through college, you’re not going to do it by simply accepting whatever scraps lowballing clients want to pay you. Don’t believe the notion that you have to work for free to pay your dues. Rather than starting at the bottom and working your way up, figure out how you can effectively target and deliver a great value proposition at the higher end of the market. Build a base of clients who see the value in what you do, and don’t bother with the ones who can’t afford the fees you need to charge to be successful. The obvious flip side of this is that if you can’t pull off charging the fees you need to meet your goals, you’ll have to rethink your career choice. There is no shame in being a talented amateur photographer. For one thing, amateurs are free to make whatever photographs they like with no regard for any market or audience at all.
Oh, and diversify revenue sources so if one part of your market dries up, you can focus more on the others.
We live in a world of carbon copies, what advice can you give to those seeking to be unique and unlike others in a congested industry?
Simple, I’ll quote Polonius: “To thine own self be true.” It’s important for photographers to be honest with themselves about what their own genuine passions are. We all do our best work when we are photographing subjects and themes that are deeply important to us, and doing it in a way that feels right to us as individuals. I’ll give you an example from my own personal experience. You have to understand that I went to work for Galen back in 1999, it was a dream come true. I was 25 and he was one of my photographic idols. I experienced a little anxiety because I hadn’t yet climbed in the Himalaya or undertaken bold rock climbs of new routes in Yosemite and the Sierra Nevada as Galen had done. I thought I would never catch up to his achievements. Gradually, I realized that while I admired Galen and his work, I wasn’t personally interested in photographing the adventure sports, mountaineering expeditions, and other types of adventure-oriented work that Galen had done over the course of his career. There was already a Galen Rowell, and I needed to be Justin Black.
Do you believe technology is making better photographers?
It depends on what you mean by that. For instance, I don’t think that technology has made the best photographers today better than André Kertész, Ernst Haas, Minor White, or Eliot Porter. A truly great photographer will always find a way to make the medium say what they want, and having something to say is the important thing. I do think that these days it’s easier to make more pictures at a higher standard of technical image quality, in part because technology has made the process easier and more forgiving, and in part because the internet provides incredible access to information about photographic technique.
When comes to seeing, composition, having a meaningful point of view or voice, however, the benefits of technology seem to be limited to the advances in communication and access to media. Via the internet, photographers can study more pictures and engage in more conversations about photography, art, and other media than they may have been able to in the past, but they ought to be choosy about the way they engage these resources. Arguing online over which camera brand is better or how much digital manipulation is acceptable doesn’t move the art forward. Since photography was invented, a gulf has always existed between those who are merely technicians on the one side, and those who use the medium to communicate in a meaningful and interesting way that contributes something new to human culture and understanding.
Of course, digital cameras and workflow are great tools for learning. The opportunity for quick feedback is wonderful, but one still needs to be able to thoughtfully analyze the work to learn from mistakes. This takes a certain visual vocabulary, to enable the photographer to understand what to look for, what works and what doesn’t. We try to teach this in our workshops.
What do you see photographers doing today, that if done differently tomorrow would improve their success?
If every photographer started demanding fees and contractual terms that enable them to operate a growing, sustainable business, and that support raising a family, buying a house, putting the kids through college, and a reasonable retirement, then you had better believe conditions and opportunities would improve significantly for photographers. By and large, photographers undervalue their work. Too few…
• Develop and follow a business plan, much less one designed for success and growth.
• Determine a CDB (cost of doing business)
• Learn to negotiate terms and fees in a manner that is beneficial to them over the long term
• Walk away from bad deals.
• Charge appropriately for valuable rights that clients may hope to be given for no additional charge.
While I do occasionally donate my work and time for charitable causes I believe in, this is almost always in the context of a scenario where many other parties (other than photographers and artists) are likewise donating time, labor, materials, content, etc. If the project has a budget for things like advertising space, graphic designers, writers, editors, PR staff, development staff, travel, and the electric bill, I generally expect to be paid fairly also at rates that I set based on the needs of my business. The artist too often is the only party expected to donate or heavily discount their work and in the process diminish its value. In general, photographers ought to feel perfectly justified in charging fairly for value delivered, rights granted, and services rendered, even when working for charities doing important work.
Unfortunately, there are also an increasing number of photographers out there who don’t actually rely on sales of their photography for their livelihood, and who offer work for sale at unsustainable rates, primarily for the sake of tax write offs or the empty ego boost of referring to themselves as “professional photographers.” Most have never had their work vetted by professional editors or curators, and they typically never net a profit on their photographic activities. I don’t have anything at all against new photographers entering the market, but I do have a problem with undervaluing one’s work to make a sale at any cost, as the cumulative effect over time is to diminish opportunity even for the most talented and business-savvy photographers who do rely on photography for their livelihoods.
Many folks are trying to re-invent themselves as photographers. Assuming you had camera, lens and lighting gear already. If you had to start over and only have $500 budget to get your business started. How would you spend that $500 budget?
If the person in question was mostly interested in trying to sell a little photography on the side but wasn’t relying on it as their primary source of income, I’d recommend they spend the money on a website. If they hope to change careers to photography as a full-time profession, I would recommend that they spend the money on a meeting with an expert business consultant who would explain that the proposed business is insufficiently capitalized to be successful. I’m serious about this. To seriously undertake photography as a competitive full-time business takes some financial resources and a well-thought-out business plan.
What are some resources that you use regularly for your photography business?
These days, my most important resource is communication with my network of professional peers and clients. It’s a big ongoing dialog and we share a lot of information. Besides that, I use Fotoquote, the Editorial Photographers’ forum, and Negotiating Stock Photo Prices a lot.
What are some ‘must have’ items in your camera bag?
My Nikon D810 cameras, the 24mm, 45mm, and 85mm PC-E Nikkor tilt-shift lenses, and 70-200mm f/4 Nikkor zoom. This combination has not only replaced the 4×5 film outfit I used to use for my landscape work, but – using stitching techniques – it has exceeded it. For wildlife, I use Nikkor 200-400mm f/4 and 500mm f/4 lenses plus 1.4x teleconverter. My macro lens is the wonderful Nikkor 200mm f/4. I also sometimes carry 18-35mm and 24-70mm Nikkor zooms. I’ve recently acquired a Sigma 50mm f/1.4 Art Series lens, which is simply superb and a lot of fun.
If you were stuck on a deserted island, what is the ONE photography book you would want to have with you?
Diary of Light: 1912-1985, by André Kertész. I could look at his compositions over and over forever and always extract new insights and meaning from them.
Here’s a fun one: Life has been found on another planet and none-other than Sir Richard Branson is piloting Virgin Galatica and has put together a team of engineers, scientist, and doctors and has asked you to come along to document the journey. The challenge is you can only bring two lenses and one camera body and two other items. What would you bring?
I’d probably bring a Nikon D810, 14-24mm f/2.8 Nikkor for spacecraft interiors (assuming cramped quarters), 24-120mm f/4 Nikkor for general purpose photography, a powerful microscope, and a Nikon F-mount to microscope adapter. After all, life on Earth consisted entirely of single-celled organisms for 2.6 billion years until multicellular life evolved one billion years ago, so odds are that the aliens would be invisible to the naked eye.
What action steps can you recommend our listeners take immediately that will ultimately help them become a better photographer?
There are a few things I would recommend. First, I like to point out that photography is a practice. We take it for granted that a musical prodigy like Yo-Yo Ma still plays scales and practices on his cello frequently, and that top athletes like LeBron James train obsessively to stay at the top of their game. Photography is no different. Eliot Porter once said, “You learn to see by practice. It’s just like playing tennis, you get better the more you play. The more you look around at things, the more you see. The more you photograph, the more you realize what can be photographed and what can’t be photographed. You just have to keep doing it.”
I also suggest spending a little time every day looking thoughtfully and critically at two-dimensional art, especially cohesive bodies of work like a particular exhibit, project, or photo essay. Photographs, paintings, drawings, abstracts… anything. Why does it work? Where does it fail? How could it be better? Does it sacrifice longevity and deeper meaning in favor of immediate eye-grabbing impact? Think about point of view and perspective. Think about quality and source of light, line, form, texture, color contrasts, etc. It’s all about building visual vocabulary and familiarity so you can make good creative judgments when it matters.
Then, find other photographers with whom you can share your work and get meaningful feedback from. Make sure that everyone is willing engage in thoughtful and honest constructive critique. I find that doing this in person is far more productive and useful than doing it on an online forum if you can.
Finally, this is a self-serving, but if I am to answer the question honestly based on my observations and experience, I’d say take a Visionary Wild workshop. I’m serious. Our first-time workshop participants are consistently amazed at what an eye-opening experience our programs are. They often tell me that they learned more at our workshop than from any other source. Our workshops and trips generally include 50% to 100% repeat clients – folks keep coming back, time and time again. I have some clients who have taken over a dozen workshops with me, and their work has become very strong indeed over that time.
Thanks for taking the time to talk, Justin.
Thank you, Alex! It’s been a pleasure.
NATURE’S BEST PHOTOGRAPHY – AFRICA

You may already be aware of the prestigious Nature’s Best / Windland Smith Rice Photography Awards, featuring an exhibit of winning photographs at the Smithsonian each year. We are pleased to announce that Visionary Wild instructor Lou Coetzer has collaborated with Nature’s Best to create a new annual competition focusing entirely on subjects from the African continent. Visionary Wild founder, Justin Black, has been invited to serve on the inaugural judging panel.
Click here for details: NATURE’S BEST PHOTOGRAPHY – AFRICA
Entries will be accepted through May 3rd, 2015, in the categories listed below. Prizes include photo safaris in Kenya, Tanzania, and South Africa, as well as exhibition at the Smithsonian National Museum of Natural History in Washington, DC, and the Iziko South African Museum in Cape Town. Mark your calendar and spread the word!
2015 CATEGORIES
• African Landscapes
• African Culture
• Wild Cats of Africa
• Birds of Africa
• Mammals of Africa
• Reptiles of Africa
• Africa Underwater
• Africa Up Close
• Africa Wildlife Story
• Youth Award (ages 13-18)
• Video
Getting Lucky on Safari
By Justin Black
For Outdoor Photographer, October 2014
One of my most important photographic mentors, Galen Rowell, grew accustomed to being told how lucky he was to capture the stunning natural events that he photographed. He would chuckle politely, and respond that he tried to be prepared to receive luck. In other words, he went to great lengths to be in the right place at the right time, well-practiced with his tools and technique, familiar with his subjects and surroundings, and able to anticipate and account for as many variables and technical challenges as he could. Galen knew that if he stacked the deck in his favor making pictures would be easy.
Each year, tens of thousands go on safari in Africa, hoping to bring home wildlife photos that capture the drama and beauty they’ve seen in the pages of National Geographic. Too often, though, the deck seems stacked against them. A photographer’s first African safari always comes with a steep learning curve. Even with the benefit of a good guide and abundant wildlife, it takes a while to get a feel for the place and animal behaviors. For many, it’s their first time with a big telephoto, introducing a range of technical challenges that they may not even have the opportunity to identify, much less overcome, during their trip of a lifetime. It’s no surprise when many people leave Africa disappointed with their photographs, wondering what they did wrong, or thinking they were plain unlucky.
The good news is that with a little preparation, awareness of the situation you’re going into, and practice of a few techniques in advance of your trip, you can radically improve your chances of “getting lucky” on safari.
Shutter Speed: If your goal is to make sharp, detailed wildlife action images with a long telephoto on a high-resolution DSLR, the common advice to use a shutter speed that is the reciprocal of focal length (i.e. 1/500 of second with a 500mm lens) isn’t going to cut it when things are in motion. Instead, try to use shutter speeds around three times the reciprocal of the focal length. For instance, with the 500mm f/4 and 1.4x teleconverter (a 700mm combo) that I commonly find myself using for wildlife, I know from experience that I’ll often need at least 1/2000 sec to truly freeze the motion of the animal, the safari vehicle, wind, my adrenalin-driven heartbeat, and so on. At the other end of the scale, you could instead choose to embrace creative blur of animals in motion, panning with them at slow shutter speeds in the range of 1/30th to 1/2 second.
ISO: It’s often said that low ISOs maximize the quality of the digital image data, but what about maximizing the photograph itself? Photographs sink or swim based on qualities other than a little noise or compressed dynamic range, so don’t be afraid of using higher ISOs if you need them. With wildlife, using a low ISO could result in too slow a shutter speed or too little depth of field, and hence a lousy photograph (though a noise-free one to be sure). I consider ISOs in the range from 800 to 1600 as “normal” for fast-moving wildlife. It is of course preferable to use lower ISOs if you can still achieve the shutter speed and depth of field that best serve your photograph, but don’t limit yourself with the notion that low ISOs are the only way to make a quality picture.
Setting Proper Exposure: It’s very easy to overexpose highlight detail in animals with light-toned fur or feathers, so make sure that you are properly evaluating your exposure for the highlights. You can do this by playing back a test image with the RGB histogram displayed on the camera-back LCD, and then magnify the image to display the brightest highlights in which you want good texture and tone. The histogram you see will be derived only from the portion of the image displayed, so you’ll be able to see whether or not your highlights are clipping. In some circumstances, such as when photographing a sun-lit bird against a dark background, you may find that you need to dial in as much as -2.0 stops of exposure compensation to avoid blowing out whites. Keep in mind that today’s RAW conversion software gives you more highlight “headroom,” so a highlight that looks mildly blown out on the camera’s histogram may be just fine in Lightroom.
Exposure Mode: Just as with my landscape work, I use either Aperture Priority or Manual modes for wildlife. You might also consider using manual exposure mode to select the specific shutter speed and aperture you need to freeze motion and achieve the depth of field you want, and then use your camera’s Auto ISO feature to adjust exposure value. This is a very powerful technique that puts tremendous creative control in the photographer’s hands.
Controlling the focus point: Virtually all DSLR cameras these days have multi-point autofocus to help you track moving subjects, but it’s important to understand how they work so you can judge when and how to use their various modes. For instance, Nikon’s 21-point Dynamic continuous focus mode makes it easy to track a flying bird, but be aware that the camera won’t necessarily find focus on the focus point that you have highlighted in the viewfinder. Let’s say you position the highlighted focus point over the bird’s eye as you follow it through the air. The camera will focus on the eye, right? Not necessarily. If the far wingtip of the bird is the area of greatest contrast falling under one of the 21 active sensors, the camera may focus there. In this case, to better control the actual point of focus, you might do better switching to single-point mode, or at least the tighter pattern of the 9-point Dynamic mode. I don’t mean to pick on Nikon either. An AF system that can read your mind to select point of focus has yet to be invented.
Depth of Field: As always, you’ll want to consider what aperture you need to stop down to if you wish to keep the subject sharp from front to back. If we imagine the bird flying by us from the previous example, let’s say we want it sharp from wingtip to wingtip. One wingtip is toward us, and the other is behind the bird’s body, so they are in different planes of focus. The priority for sharpest focus is typically the bird’s head, so that’s what you’ll probably choose to focus on. In this scenario it isn’t uncommon to need fairly small apertures to keep everything sharp. For example, if the bird in this example has a three-foot wingspan, is sixty feet away, and you’re photographing it with a 600mm lens on a full-frame DSLR, you would need to use f/16 to keep it sharp from tip to tip. This is one of the reasons those higher ISOs are so handy.
Also, when making head-on animal portraits, try focusing in front of the eyes and just behind the tip of the nose, and then stop the aperture down so depth of field covers the tip of the nose back to the eyes and ears. If you focus precisely on the eyes, the nose of the animal could be disturbingly soft.
Camera Control and Setup: The ability to react quickly is critical for wildlife photography, so you’ll want to set up your controls and presets for efficiency, and then you’ll want to spend time familiarizing yourself with them. For instance, for landscape work I focus using my camera’s thumb-operated AF button and deactivate autofocus activation on my camera’s shutter release so it won’t re-focus when pressed. For wildlife, however, I turn shutter-release AF back on, because I can simultaneously focus track a subject and change AF point or aperture with my thumb via the controls on the back of the camera. I’ve learned that my favorite AF modes – single-point, 21-point, and “auto” – are all three clicks of the dial apart so I can set them by feel. Special features that you like to use frequently can often be assigned to function buttons for instant access, such as your camera’s crop mode, which gives you greater magnification and faster frame rate on some cameras. It’s a good idea to use your cameras’ personal menu features to provide quick access to menus that you access most frequently.
Attentiveness: I have real difficulty following baseball games at the ballpark. The action is so intermittent that I end up chatting with friends rather than paying attention to the game, so I always miss the peak moments. Some people find wildlife photography challenging for the same reason. If you want great wildlife photographs on safari, you’ve got to pay attention to animal behavior, be aware of what is going on around you, and be ready to react quickly and decisively. Peak action sometimes comes on fast and with little warning, but often, the attentive and perceptive photographer can improve their changes by anticipating opportunities and staying ahead of the game. It goes without saying that it is a lot easier to get a great shot of the bird in flight or the sprinting impala stretched flat-out in mid air if you saw it coming toward you ten seconds ago, as opposed to trying to catch up with it when you notice only as it zips by.
Tracking the Subject: Speaking of zipping by, the ability to pan a fast-moving animal with a long tele while keeping it where you want it in the frame is not one that most people are born with. Photographers who are good at this make it look effortless, but it takes a lot of practice. For the first time safari photographer, I recommend going out with your longest lens to find subjects that you can use to practice panning, even if its just pigeons in flight or dogs playing at a local park. The goal is to decide where you want the subject in frame, lock tracking focus on it, and try to keep it sharp and in the right position as you fire off a series of frames. It may not be easy at first, but after some practice it will become child’s play, and your safari images will be much better for it.
Predicting Animal Behavior: Studying up on the behavior of the animals you’ll be photographing will help you anticipate what an animal might do in a particular situation, but if your local safari guides are knowledgeable and experienced in the area you visit (as they ought to be), you should be able to rely on them to advise you about wildlife activity and the position the vehicle properly to take advantage of the opportunities you encounter. The selection of local guides is tremendously important, since few first time visitors will be able to adequately anticipate animal behaviors and habits.
Safari vehicle photo setup: The arrangements for photography in your safari vehicle significantly influence the quality of a photo safari experience. A safari operator who understands the needs of serious photographers will limit the number of photographers per vehicle to provide plenty of space for you to maneuver with a big telephoto and work unobstructed. The bar has recently been raised, however, in the form of state-of-the-art safari vehicles (both 4WD land vehicles and boats) with a small number of customized swiveling photographer’s chairs positioned along the centerline for maximum visibility and stability. Each incorporates an integral 360-degree revolving camera mount that is height-adjustable with a gas-assist lift, and mounted with a Wimberley head to balance a long telephoto for effortless handling for hours on end. This setup delivers smooth and stable panning of fast moving animals, quick repositioning, and an incredibly stable and user-friendly camera platform. I’ve found that vehicles equipped this way absolutely revolutionize the experience, enabling even relative novices to take home a surprising number of great images. The traditional camera mount solutions for safari vehicles – bean bags, window brackets, or clamp-on mounts – may provide decent stability, but in general they can’t compete in terms of capability, flexibility, and performance.
When to go? Now!
Finally, you’ll want to give some thought to the timing of your safari, and I’m not simply referring to the month or the season. The sad reality is that wildlife in Africa is facing tremendous pressures and is experiencing a startling decline. Anyone with an urge to see African wildlife in a diversity and abundance that we associate with “wild Africa” ought to do so sooner rather than later.
Lions, for example, are 95% gone. Numbering in the hundreds of thousands in the early 20th century, over the last century they have been decimated – as few as 15,000 may still remain in only 14 of the 49 African nations that were once their home. The fundamental cause of this crisis is the rapid growth of human populations in Africa, along with the accompanying pressures on wildlife: expansion of agricultural land and fragmentation of habitat, persecution of lions by herders, hunting of both lions and their prey species, and more. Since they need expansive territories, large predators like lions are “canaries in the coalmine” of habitat loss. They are also essential to maintaining healthy balance in the ecosystems they inhabit. As go the lions, so goes wild Africa.
Despite the challenges, there are credible efforts being made to protect lion populations and habitats that are also depended upon by countless other species. The international non-profit organization Panthera is at the vanguard of coordinating conservation of important big cat habitats, and numerous other conservation NGOs are working tirelessly to make the connection between sustainability of biodiversity and the sustainability of human societies.
Responsible eco-tourism is critically important to this equation, as nature-loving tourists (and many readers of this magazine) convey a compelling economic value on healthy ecosystems and sustainable wildlife populations. Visitors to Africa can vote with their dollars by giving preference to nations, communities, safari operators, parks, and preserves that are doing the most for sustainable resource management, protection of biodiversity, and the well-being of local communities that benefit more from protecting the resource than from destroying it.
I remain optimistic despite the challenges. Years from now, perhaps others will look at the pictures from our latest African safari and tell us how lucky we have been to capture them. Hopefully we’ll be able chuckle like Galen, amused in the knowledge that an abundance of wildlife served up endless photo opportunities ripe for the taking. If so, the trick will have been two-fold: we were prepared to receive luck, and did what it took to ensure that there was still luck to receive.
Nikon D810 Follow-Up

As promised, here is the follow-up to the post in which I shared my first impressions of the new Nikon D810. During Visionary Wild’s recent safaris at Maasai Mara, Kenya, and Chobe River, Botswana, I put the D810 to the test as a camera for wildlife action. The camera got covered in dust, rained on, knocked around, and performed flawlessly through 10,000 exposures. In a nutshell, I am most impressed.
Autofocus: I had expected the AF system to be improved over the D800E, but this is a whole new animal. As anticipated, the “Group” sensor array worked well, but it was the 3D 51-Point Dynamic mode that was most improved. It did a superb job of tracking fast-moving birds against complex, contrasty backgrounds, and when it did lose track of the subject, it reacquired it much faster than the D800 or D4 would. Chalk one up to the D810. I would still like to see the AF sensor array distributed across more of the frame.

African skimmers at sunset, Chobe River, Botswana. Nikon D810, 500mm f/4, ISO 1600, 1/1600 sec @ f/5.6. Photo © 2014 Justin Black
Optically optimized sensor: The D810 sensor, free of an optical low-pass filter and newly equipped with microlenses over the photosites does indeed appear to deliver marginally more resolution and sharper edges than the D800E’s. I haven’t had a chance to test whether the sensor responds better to older lenses that weren’t optimized for digital (wide-angle lenses in particular should benefit), but I am eager to do so.
Dust Repelling Sensor? Despite spending two weeks on safari in locations with lots of dust and plant particles in the air, I can hardly find any dust specs in my D810 image files. I’m not sure what to attribute this to, particularly since I tend to be pretty cavalier about changing lenses in dusty conditions, and I didn’t clean the sensor or even blow the camera out because I saw no need. Is it more effective in-camera sensor cleaning at start-up and shutdown? Does the sensor have a new anti-static coating that is better at repelling dust? I don’t know yet, but I’m going to try to find out whether Nikon made a change here or if I was just lucky.
Dynamic Range, High-ISO and Low-Light Performance: My plan for Africa was to use the D810 in “good light,” but to switch to a D4 for low light, high-ISO situations. What I found amazed me. The dynamic range is a little better overall, but beyond that Nikon has significantly improved the performance of the D810 sensor at higher ISOs, so much so that I would be happy using it as my only camera for everything I do. You might be asking, “But, isn’t the D4s still better at the highest ISOs and in the murkiest conditions?” Yes and no, depending on what you mean by “better.” The reality is that the noise, detail, and tonality in D810 files made at higher ISOs look a lot better than in comparable D800 images. Also, you can make a D810 file made at ISO 6400 look just as clean as a D4s file made at ISO 6400, simply by downsizing the file from its native 36MP resolution to the 16MP resolution of the D4 (along with some basic noise reduction of course). The image below was made at ISO 3200, but our recent Safari Update post features a portrait of a lioness that I made at ISO 6400. Talk about a versatile camera!

Malachite kingfisher in last light, Chobe River, Botswana. Nikon D810, 500mm f/4 + TC-14EII (700mm), ISO 3200, 1/640 sec @ f/5.6. Photo © 2014 Justin Black
Processor – Buffer – Speed: Everything on this camera runs faster and less intrusively than on the D800, and even shooting long bursts of fast-and-furious wildlife action at 5 frames per second (14-bit, 36MP NEF raw files) I never buffered out. The increased frame rate was greatly appreciated, and I found myself using the 1.2x crop mode at six frames per second with some frequency. Score another point.
Balanced mirror: As mentioned before, I love the quieter and better-damped mirror. While this might seem like a small tweak, in practice it is a major improvement.
Electronic first curtain: I tested this feature (accessible only in Mirror-Up advance mode) and confirmed that it works. Gone is the subtle motion blur introduced by the inertia of the mechanical front shutter curtain. I found that the issue was only really noticeable when working in high magnification scenarios (telephoto or macro work) on a tripod, but this is a legitimate improvement nevertheless.
Highlight Priority Metering: As anticipated, this did indeed prove to be a very useful solution for holding highlight detail in wildlife subjects in dynamic lighting situations, particularly set up to be activated instantly on demand with the “Fn” button on the front of the camera.

Pied kingfishers fighting over fish, Chobe River, Botswana. Nikon D810, 500mm f/4 + TC-14EII (700mm), ISO 1250, 1/2000 sec @ f/8, Highlight-Priority metering. Photo © 2014 Justin Black.
And finally, a HUGE improvement from a landscape photographer’s point of view…
Split-Screen in Live View: The feature isn’t of much use for wildlife, but it is immensely useful for my landscape photography, for which I use Nikon’s PC-E tilt-shift lenses 90% of the time. This enables us to zoom into separate points in the foreground and background simultaneously, facilitating the process of setting the position of the focal plane, both in terms of speed and accuracy. I will be using this feature a great deal.
The D810 goes way beyond simply being a refinement of the D800E. I have found it to be a very worthwhile upgrade with new capabilities that meaningfully enhance my ability to successfully execute the photographs I want to make. Well done Nikon!
–Justin Black
Safari Update

On our recent safari in east Africa’s Maasai Mara / Serengeti ecosystem, we encountered three very special lions – Sikio, Morani, and Scarface (as viewed left to right above). These powerful brothers are the leaders of the Marsh Pride, made famous in BBC’s Big Cat Diary documentaries. They had crossed the Mara River to follow the bounty of the wildebeest herds, and made most of their foray into “foreign” territory by mating with the lionesses of the Oloololo Pride.
One morning, we spotted Morani returning to a tree they seemed to use as a rallying point, carrying a young wildebeest that had likely been taken down by one of three lionesses that followed close behind him.

After setting his stolen prize in the shade of the tree, Morani strutted, scent-marking the tree with an expression on his face that gave the impression of immense self-approval. One of the lionesses used this moment of apparent distraction to sneak in and attempt to snatch the kill away, but Morani chased her off. While the big male continued carrying on, she sat across a small ravine, glaring at him.

To watch this drama unfold just a few meters away was a tremendous honor.
HDR (A Different Way)
By John Shaw
I’m not a fan of HDR images. Well, let me clarify that statement. I’m not a fan of the all-too-typical HDR images I see. Over-saturated cartoonish colors, with halos around edges, and lots of noise. No thanks.
But there is a quick and easy way to create naturalistic looking extended dynamic range images, by using Photoshop’s HDR Pro to first create a 32-bit file, and then using the adjustments in either Camera Raw or Lightroom’s Develop module to work on that file. To be honest, I thought many photographers already knew this trick, but on a recent Van Os Photo Safari which I was leading I discovered that very few of the participants seemed aware of it. So…OK, here goes, step-by-step.
1) Shoot a series of images varying the exposure by one or two stops between shots, just as you would for any HDR composite.
2) In either Lightroom or Camera Raw make whatever basic adjustments are necessary.
3) Select all the images, and open all in HDR Pro. From Lightroom: Photo > Edit In > Merge to HDR Pro in Photoshop. From Bridge: Tools > Photoshop > Merge to HDR Pro.
4) In HDR Pro, check Remove ghosts, and select 32 Bit as the Mode.

5) And now, you have a choice to make. If you normally work in Camera Raw, check the box to Complete Toning in Adobe Camera Raw. If you normally work in Lightroom, just click OK at the bottom of HDR Pro, and then save the file as a TIFF. Make sure you save it as a 32-bit file.

6) If you’re going the Lightroom route, import this new file into Lightroom, and then open it in the Develop module.
7) With either method, process the file in Camera Raw or Lightroom as you normally do… but check out the range of the Exposure slider. It’s now plus or minus 10 stops either way, double what it was before.
Nikon D810 – First Impressions
The decision was made: I would keep my Nikon D800E camera bodies. The D800E has been such a superb solution for the bulk of my work that I’ve had a hard time imaging how Nikon would improve upon it. When I first heard that Nikon was releasing an updated 36-megapixel camera, I took a quick look at the specs and was underwhelmed. I had been hoping for a faster camera of the same resolution for wildlife work, but a frame rate increase of a single frame per second, from four to five, wasn’t terribly compelling to me. The most significant advancements seemed targeted at videographers, and I shoot stills almost exclusively. It seemed that I would be happily hanging on to my D800Es for a couple more years, until the next generation came along.
Then I actually handled a D810, and started digging into it a little deeper. What I found was a camera that isn’t merely a D800 with some minor tweaks. Its well-conceived refinements and highly useful new capabilities aren’t just insignificant hype. For me, they will solve real-world problems and facilitate my photography in meaningful ways.
Here are a few of the features of the D810 that ultimately changed my mind:
Electronic Front-Curtain Shutter – freedom from sharpness-robbing shutter vibration: Here’s an anecdote than makes clear the real-world usefulness of this feature. On the recent Visionary Wild Iceland expedition, co-leader Daniel Beltrá and I conducted a little experiment. We mounted my D800E with a Nikon 70-200 f/4 VR lens (one of the sharpest zooms of all time) and shot two frames, both zoomed to 200mm, at 1/40th second and f/11. The first was shot with the lens solidly mounted on a tripod (Really Right Stuff TVC-24L, BH-55 ballhead, and lens collar), with the mirror locked-up, a three-second exposure delay, and with lens vibration reduction turned off. The second image was shot hand-held at the same zoom and exposure settings, without mirror lockup or exposure delay, but with vibration reduction on. When we compared the images zoomed in at 100%, the hand-held image was noticeably sharper and slight motion blur was clearly visible in the tripod-mounted image. We repeated this scenario several times and found the same result. The 70-200mm f/4 does have excellent VR, but still, the tripod rig was rock solid. Why was this happening?
Vote for Wildlife Photographer of the Year

The judging panel of the Wildlife Photographer of the Year Competition (operated by BBC Worldwide and London’s Natural History Museum) have selected photographs by Visionary Wild instructors Jack Dykinga and Justin Black from among 41,000 entries for inclusion in a set of fifty top images open to public voting for the inaugural People’s Choice Award.
Dykinga’s photograph, Dawn Lift-Off, is an explosion of snow geese taking flight en masse at New Mexico’s Bosque del Apache wetlands, while Black’s Apex Predators, made last year in Brazil during our Jaguars of the Pantanal expedition, captures the peak action of a mature male jaguar capturing an eight-foot yacare caiman, clearly demonstrating the power, grace, and hunting prowess of this remarkable animal. Voting is open until September 5th, 2014, and the winner will be announced at the Wildlife Photographer of the Year awards ceremony to be held in London in October.

For more information on next year’s Jaguars of the Pantanal expedition, please click here.
JACK DYKINGA STATUS UPDATE – June 9, 2014
In the early hours of May 24th, Jack Dykinga underwent a double lung transplant at St. Joseph’s Hospital in Phoenix, Arizona. We are very pleased to report that the procedure was an outstanding success, and Jack has since been making excellent progress while recovering in the hospital. The anonymous donor of Jack’s new lungs appears to have been exceptionally fit, as Jack’s lung function was recently tested at 100%. Jack will soon leave the hospital to continue his recovery in more hospitable surroundings, and is expected to complete his recovery within the next two or three months. Jack has expressed repeatedly his profound and heartfelt thankfulness to all the friends, family, fans, and medical team who have contributed to his wellbeing through this process. He is looking forward to making the most of this gift of a second chance and a full life.
JACK DYKINGA STATUS UPDATE – May 22, 2014
News of Jack’s hospitalization has been spreading, and outpouring of well-wishes via cards, email, and other means has been amazing. Jack is deeply touched by the tremendous expression of love and support! He does however ask that friends and fans PLEASE REFRAIN FROM CALLING. Jack’s iPhone has been ringing off the hook, but he is generally not in a position to take calls. Also, please keep in mind that he isn’t able to respond to inquiries or messages that require a reply, due to the volume of correspondence that is pouring in.
Jack remains in the hospital waiting for the green light from his medical team to proceed with a lung transplant. He is upbeat and in generally positive spirits. We will update his status here as we are made aware of significant developments.
Jack Dykinga Status Update, May 20, 2014

Jack Dykinga – Pulitzer Prize-winning photojournalist, world-renowned landscape photographer, and Visionary Wild instructor – has recently been hospitalized due to progression of a chronic lung condition called Ideopathic Pulmonary Fibrosis that he has been living with for the past three years. He is presently at St. Joseph’s Hospital in Phoenix, Arizona, awaiting a double lung transplant. He is considered an excellent candidate for the procedure as he is otherwise fit and in good health, but it is of course a major procedure that involves some risk and potential for complications. Fortunately, there have been major recent advances in both the procedure and after care for lung transplants, and his transplant team has an excellent track record, so Jack’s chances of a successful outcome are very good indeed. Jack is expected to undergo surgery sometime in the next few weeks, after which time he will have a carefully managed recovery of two to three months.
Though presently bored and frustrated that he finds himself more or less confined to a hospital bed and breathing apparatus for the time being, Jack is in reasonably good spirits and very good hands. He has the benefit of the support of his loving family, countless loyal friends, and a top-notch team of medical professionals. While Jack certainly appreciates your support and well-wishes, he asks that any correspondence be sent without expectation of a reply, as his hands are already full keeping up with other obligations. He also discourages phone calls until further notice, as his breathing apparatus makes conversation impossible. Those who wish to send cards may mail them to the following address:
We hope you will join all of us at Visionary Wild in supporting Jack through this difficult time. We wish him a speedy and successful recovery, and we look forward to seeing him walking tall with a spring in his step once again.
Justin Black Video Interview by PhotographyTalk.com
Recently, Alex Schult of PhotographyTalk.com sat down with Visionary Wild’s Justin Black – virtually, via Skype – for an interview recorded for their Success Interviews series, revealing the creative inspiration and path to success of noted photographers working today. Click here to watch the full 39-minute interview.
Trip Report: Jaguars of the Pantanal, August 2013
Photos and text by Justin Black

Last month, photographer Jeff Foott and I led a small group of six passionate photographers on a photo expedition to Brazil’s Pantanal wetland, where we enjoyed an experience that I would have thought to be a ridiculous fantasy just a few years ago. Back then, I shared the common perception of jaguars as shy, reclusive, and mostly nocturnal animals, extremely wary of human approach and rarely seen even by life-long residents of their native habitat, despite having a wild population of between 50,000 and 100,000 in a range spanning from Arizona to Argentina. What we experienced in the Pantanal turned that notion on its head.

Working from two stable flat-bottomed boats, our group photographed multiple cats each day as they hunted and patrolled their territory along the banks of the rivers, and two members of our party even managed to document a mother jaguar and a yearling daughter that were previously unknown to scientists, earning the right to assign nicknames – “Sally” and “Elli” – to the new cats in the process. In this part of the Pantanal, however, our experience wasn’t unusual. All the cards were stacked in our favor.

The jaguar and their prey occur at maximum biological carrying capacity, the cats aren’t hunted in this particular area, two of their major prey species – caiman and capybaras – are on the riverbanks during the daytime, and sport fishermen have been plying the rivers in motor boats for years. So, there are a lot of cats drawn to the rivers by a lot of prey, they aren’t afraid of humans in boats, and they’re active and visible in good light. Nowhere else are the conditions so good for seeing jaguars, much less spending considerable time with them and photographing them from relatively close range.
The highlight of the expedition was the hunt on August 25th of an eight-foot yacaré caiman by a 290lb., seven-year-old male, nicknamed “Mick Jaguar” by local biologists. An experienced and battle-scarred fellow, Mick’s right eye is partially obstructed by a membrane injury. During another “Mick” sighting a few days earlier, I had noticed that he had oozing puncture wounds on his left front leg – presumably from defensive bites by a caiman or territorial battle with another jaguar.
 On the day of the hunt we spotted Mick as he emerged at the far end of a long sandy beach upstream from a channel that connected the main river to a large oxbow pond. Basking in the sun on the banks of the river and swimming in the channel were a number of caiman, a favorite prey of jaguar in the Pantanal, despite the risk represented by their numerous two-inch teeth and powerful jaws. As he walked down the beach, Mick quickly switched to hunting mode, adopting a cat’s low, slow stalk. He would move forward a few steps, eyes locked dead ahead on the prey-rich area around the channel, then lie down and assess the situation for a minute of two before continuing on. He was deliberate and patient – covering the length of the 50-meter beach took him about ten minutes, during which time I had our boat driver position us just below the channel so we would have a better perspective if any action unfolded.
By the time he entered the hyacinth at the water’s edge, we still didn’t know exactly what he was after. He paused and sized up his options. Then,  quietly but with purpose, he entered the channel and began swimming toward – unbelievably – the largest caiman on the beach, close to eight feet long and probably over forty years old. The reptile was directly in front of us, probably only 100 feet away, and right out in the open. We couldn’t believe our luck, but all of us in the boat were poised and ready to receive it!
 Mick’s profile in the water was very low, with only his eyes, ears, and nose above water… like a crocodile. When we had seen jaguars swim before, their backs typically broke the surface, so it seemed that this was deliberate. He crossed the channel in 24 seconds, moving into position directly behind the caiman in its blind spot. Mick’s feet once again found purchase on the sand and…


…he exploded from the water and onto the caiman’s back, swinging his right paw into its side to hook into it with his claws. His left paw followed immediately thereafter.


As Mick’s momentum carried them both into the water at the river’s edge, he went for a killing bite at the base of the caiman’s skull. His angle was no good, so he pinned the caiman with his body while he turned his head into a better position.


His jaws found their mark, and in one powerfully fluid motion, he lifted the front half of the caiman’s body off the ground, spun it around to his left, and started trotting back toward the channel. The caiman weighed around 150lbs., but Mick appeared to handle it as easily as a big dog with a chew toy.


As the caiman looked back at his attacker, Mick pushed it into the channel broadside, pushing a bow wave ahead of them. Amazingly, this crossing took no longer than the first. Mick walked up the sandy bank, into the tall grassed behind the beach, most likely headed for the cover of the nearby forest. His prize would feed him for days during which time he would guard the carcass, so we realized we wouldn’t see Mick again before we had to head for home. He’s an amazing animal, and we all felt privileged to have be fortunate enough to witness that spectacular display of power, grace, and hunting prowess. After this experience of a lifetime, we had a new appreciation for each jaguar we were fortunate enough to see.


The other denizens of the Pantanal were a joy to observe and photograph as well, of course. Giant otters, toco toucans, capybaras (the world’s largest rodent at up to 90lbs.), tapirs, yacaré caiman, jabiru storks, kingfishers and an array of raptors competed for our time and attention, putting on a great show of their own. Honestly, even without the big cats, the Pantanal is a wonderful place to photograph, especially birds, with species numbering in the hundreds. The fact that added to everything else, we also saw jaguar every day we were on the river, with multiple sightings each day some lasting over an hour, and the discovery of new cats that hadn’t been known before truly made this the trip of a lifetime.
When I returned home, I was very pleased to find that a number of international news agencies and the Huffington Post were interested in my reportage of the event, and even happier that our friend Paul Donahue – a biologist and all-around great guy who had been photographing from our second boat along with Jeff Foott – had his photos picked up by National Geographic’s online news site. While it’s always nice to be published, I hope that the light we and others shed on how special this place is will play a part in its conservation. Visionary Wild is supporting efforts underway to use ecotourism to protect the Pantanal’s biodiversity in an area the size of New Jersey – including the most important jaguar habitat – while enhancing the local economy and reducing the killing of jaguars by ranchers seeking to protect their herds. It is our hope that it can be demonstrated to more of the local communities that the jaguars of the Pantanal, rather than being vermin, represent a valuable resource worthy of protection.
We hope you can join us for our next visit with the Jaguars of the Pantanal, August 7-15, 2014. Click here to read more.

Technical details: Nikon D800E and D7100 cameras, and Nikkor lenses.
Choosing a Tilt-Shift Lens
By Justin Black

The Offering, Dead Vlei, Namibia – 85mm PC-E Nikkor, Nikon D800E
In my experience, most people find that the longer focal lengths, like Nikon’s 85mm PC-E lens, are easiest to learn to use. The more limited telephoto depth of field makes the effect of tilting the focal plane more pronounced, so it’s easier to see clearly where the focal plane is falling sharply in the scene, and where things are out of focus. The 85mm is particularly useful for photographing compressed landscapes, isolated graphic details, and semi-macro compositions.

Kokerboom tree forest, Namibia – 24mm PC-E Nikkor, Nikon D800E
For classic wide-angle “near-far” type landscapes, the 24mm is the way to go. Most folks find at first that it’s a little harder to accurately set the tilt of the focal plane with the 24mm due to the greater inherent depth of field of the lens, but it is also a little more forgiving for the same reason. Still, one of the beauties of tilt-shift lenses is that you can control sharpness throughout a scene without stopping down excessively, so it’s best to learn to position the focal plane accurately.

Nocturne, Kolmanskop, Namibia – 45mm PC-E, Nikon D800E
The 45mm is an excellent lens with a normal perspective, and I know several photographers who consider it their favorite of the three. I love it when I need it, but my image archive reveals that of all the images I’ve made with the three PC-E lenses, I’ve only used it 22% of the time. In comparison, I’ve used the 24mm 31% of the time, and the 85mm 47%. All three lenses are optically superb and focus very close. They all are capable of tilts and swings for focal plane control, and shift, rises, and falls to control perspective, such as avoiding the converging vertical lines that you get when tilting a camera to look up at tree trucks in a forest.
I think is important to point out the primary reason that PC-E lenses allowed me to justify parting company with the 4×5 view camera system that I used to create the bulk of my work before I went fully digital in 2010. While I use the tilt features to optimize the plane of focus for nearly every composition, it’s the shift feature that facilitates most of my landscape work. By making overlapping exposures, shifting left-to-right or up-and-down, I can create a super-high-resolution file that compares favorably with the 4×5 film I used to use. In fact, with a D800e, this approach clearly exceeds the resolution (and vastly exceeds the dynamic range) of a 600MB 16-bit drum scan from 4×5 Fuji Velvia transparency film.
For a horizontal composition, I set the camera vertically and shift the lens left to right, shooting three to five overlapping frames that get merged later in Photoshop to create a single image that equates to roughly 72 mega-pixels resolution. The long dimension of the camera sensor becomes the short dimension of the final image. Because only the lens moves and the orientation of the camera’s sensor doesn’t change between exposures, this technique avoids the perspective distortion of rotating panoramic photography and makes merging the constituent image files in Photoshop dead easy. Shift-stitching also has the effect of making the lenses’ field of view wider, so I use the 24mm like a 16mm ultra-wide, the 45mm like a 30mm wide-angle, and the 85mm like a 50mm normal lens. All three of the images that illustrate this article were made using this shift-stitch technique, so the field of view represented by each of them is wider than a normal single frame would be (basically, about the same as two vertical frames side-by-side), and the image proportions are roughly 3:4 (which I tend to prefer), rather than the 2:3 proportions of a standard DSLR sensor.
Tilt-shift lenses are immensely powerful tools that offer a wide range of capabilities that are otherwise impossible or difficult to reproduce. They aren’t for everyone, however, so if you’re curious but aren’t sure which tilt-shift lens is for you, I recommend renting one for a few days when you have time to really put it through it’s paces. Be careful though, you might find that you need all three.
An Elegant Portfolio Website Solution
 Amateur and professional photographers alike are constantly seeking elegant solutions to display their best work online. We are excited to announce that our friends at Paupress have launched Justin, a new e-commerce enabled website solution for photographers, and indeed all visual artists. Click here to check it out. In its most basic form, Justin is a WordPress theme based on the fundamental design, architecture, and functionality of Visionary Wild founder Justin Black’s recently re-launched portfolio website, www.justinblackphoto.com. For those seeking to manage online sales and customer contacts, Justin is designed to seamlessly integrate with a powerful and easy-to-use customer relationship management and e-commerce tool created by our friends at Paupress. Users can opt for simple, portfolio-only functionality, or for full e-commerce and CRM support. The theme can be customized to suit the artist’s individual tastes and needs. If you’d like to present your best work online in an elegant, clean, and effective and professional manner, we invite you to check out the Justin theme at Paupress – www.paupress.com/justin/
Blending Exposures – Lightroom to Photoshop and Back Again
 By Justin Black
2) Import images into Lightroom (LR).
3) Process each image as you normally would, paying attention primarily to the highlight values in the darker image, and the shadow and mid- tone values in the lighter image. You generally don’t need to worry about correcting clipped highlights in the lighter image or clipped shadows in the darker image, since you probably won’t be using them.
4) As a starting point, it’s a good idea to set identical values for the following settings:
• White Balance (Temp and Tint)
• Presence (Clarity, Vibrance, Saturation)
• HSL and Color sliders
• Detail (Sharpening, Noise Reduction)
• Lens Corrections
• Effects
• Camera Calibration
The easiest way to set these identically is to select both images and use the Sync Settings function. You can always depart from the synced settings if you wish.
5) Once you’ve made LR adjustments to each image, select them both. In the LR menu at the top of the screen, go to Photo > Edit In > Open as Layers in Photoshop.
6) In Photoshop (PS), you’ll see that both images are open as layers, one above the other.
7) Add a mask to the top image by going to the Layers window, clicking on the top image, and then clicking the mask icon, which looks like a grey box with a white circle on it.
8) In the Layers menu, click on the white mask symbol to the right of the top image layer. This will set you up to work on the mask.
9) Select the brush tool, and set the color to black, opacity to 100%, and hardness to zero.
10) Paint on the mask anywhere that you want to hide the top image and let the bottom image show through. You can vary brush size, hardness, and opacity, and switch back and forth between white and black to refine the mask.
11) You should now have two exposures blended into one. At this point, you can add adjustment layers above the original images and proceed with your normal PS workflow to finalize the image, or simply Save As the file back to the original folder that they came from. The composite image will be automatically added to your Lightroom catalog.
Ten Photoshop Tips
 by John Shaw
1. To tone down the whites in an image, select them using Color Range. Add any adjustment layer, and change the layer blending mode to either Multiply or the slightly stronger Linear Burn. Then drop the layer opacity to taste.
2. When shooting frames for a panoramic, manually setting camera exposure is more precise than using an autoexposure mode. Use the middle of the panoramic scene to set the base exposure. If you’re shooting RAW files, you can leave white balance (WB) set to Auto. When processing the files in Adobe Camera Raw, or Lightroom’s Develop module, select one image and drag the WB slider from the “as shot” position to a distinct number. Now sync all the other frames to that WB.
3. Make a preset to rename your files in Bridge or Lightroom based upon the capture date. When you travel, reset the clock in your camera to the local time zone. This way, all your image captures will match up with your itinerary and there will be no confusion as to location. Just remember to reset the clock when you get home.
4. Photoshop’s Ctrl/Command+Z undoes the last step you’ve taken. But using it immediately a second time simply undoes the undo you just made. To step backward more than once, use Alt/Option+Ctrl/Command+Z.
5. When preparing an image for printing, as the final step add a 3 pixel black hairline around the perimeter to define the edge. Three easy ways to do this:
- Select the entire image, Ctrl/Command+A. Then do Edit > Stroke, and set pixels to 3, the color to black, and the location to Inside.
- With the image layer unlocked, add a Layer Style, Layer > Layer Style > Stroke (or click on the fx icon at the bottom of the Layers Palette). Set pixels to 3, Position to Inside, and color to black.
- Increase the canvas size, Image > Canvas Size. Select pixels for the unit of measurement, 3 for the number of pixels, black for the color, check the Relative box, and make sure the middle square is the anchor position.
6. Opening several similar images as layers in Photoshop (from either Bridge or Lightroom) aligns the outer dimensions of the images. To align the contents, select all the layers, and then do Edit > Auto-Align Layers.
7. Make a brush to add your name and copyright to images. Make a new white document no larger than 2500 pixels long dimension. Add the copyright symbol and your name. Then do Edit > Define Brush Preset. For a signature brush, write your name on white paper using a black marker, photograph it (jpeg, small, fine), and size the image to no larger than 2500 pixels. Using Image > Adjustments > Levels clip the image to pure white and pure black. Save as a brush, Edit > Define Brush Preset. If you use either of these brushes on a new layer, you can add Layer Styles (drop shadow, etc.) to that layer.
8. Caps Lock toggles the cursor display — for example, from standard to precise.
9. Use the often overlooked Image Processor (from Bridge: Tools > Photoshop > Image Processor) to quickly create new file types. Select the images, choose an output location, select the file type you want, specify the quality and size, and click Run.
10. When making selections, remember that the “marching ants” only show pixels that are at least 50% selected. Outside of the “ants” are pixels that are also selected, just at a lesser amount.
These tips originally appeared as part of an article John wrote for Photoshop World magazine. John co-leads our Vision Workshops series with Jack Dykinga and Justin Black, and in 2014 will lead trips to New Zealand, Iceland, and Patagonia for Visionary Wild.
Tools and Techniques for Creating Fine Prints

Our friends at Hunt’s Photo Video and Ilford are sponsoring a free webinar on fine print making,
Join the Live Video Broadcast on March 29, 2013 at 1:00pm EDT
What are the aspects and qualities that make for a Gallery-Quality Fine Art Print? Exacting color, smooth tonal transitions, a well-balanced contrast range and the best paper choice for the image all come together to make a print worthy of hanging in most any venue or location. Color workflow, soft-proofing and what fine edits to make will all go a long way towards making your results both accurate and repeatable. In this presentation, we’ll explore the process, tools and techniques from edit to output that allow you to produce a print both you and your collectors will be proud of.
Eleven False Statements
by John Shaw
Editor’s note: There’s a lot of photo-mythology floating around out there. Visionary Wild instructor John Shaw puts a few of his favorite myths to rest.
1. Images for the web should be sized at 72 dpi. First of all, “dpi” refers to dots per inch, and computer screens have pixels, not “dots.” But “72 ppi” is also false. Pixels dimensions are the only criteria for computer images. 1200 pixels are 1200 pixels, whether they be 1/inch or 1200/inch. You still have 1200 pixels. Say you have an image that’s 1000 x 500 pixels at 72 ppi. How many total pixels is that? 1000 x 500 = 500,000. Resize to 1000 x 500 pixels at 300 ppi. How many total pixels is that? 1000 x 500 = 500,000. Exactly the same. If you’re resizing web images to 72 ppi, you’re simple adding a useless step to your workflow.
2. Mac monitors use 72 ppi while Windows ones are 96 ppi. Sorry, this is a myth. If it were true, a monitor would have to change resolution depending on whether it was connected to a Mac or a PC. Want to know roughly what the resolution of your monitor is in ppi? Measure the horizontal width of the screen and divide this into the horizontal pixel dimension at the monitor’s native resolution. My laptop’s screen is 1920 pixels wide, and measures about 13.5 inches horizontally. 1920/13.5 = about 142 ppi.
3. You should set Adobe RGB in your camera if you’re shooting RAW files. While this might affect the image displayed on the camera’s LCD, it does not directly affect a RAW file. After all, if Adobe RGB were actually applied, the file would no longer be RAW data.
4. For the best RAW file results, set a specific white balance in the camera. Don’t use Auto White Balance. RAW files have no white balance. Just as I said above, if a white balance were applied the file would no longer be RAW. A specific white balance is only set when the file is processed into a standard graphic file format such as .psd or .tiff or .jpeg; that is, when it is no longer a RAW file.
5. This RAW image is how it appears right out of the camera. Not true. A RAW image has to be rendered in some way before you can even see it. Exactly how it is rendered depends on the default settings of the RAW conversion software you use.
6. You can evaluate exposure by looking at the image on the camera’s LCD. You can adjust the LCD’s brightness on almost all DSLRs, so exactly which level of brightness would be “correct?” Sorry, not true at all. For that matter, the camera LCD most certainly is not a color corrected and calibrated monitor. You can evaluate composition; you cannot evaluate color or exposure. You definitely should use the histograms for exposure information.
7. Always use a UV filter to protect your lens. From what? Dirt and fingerprints? Then you must take the filter off for every shot, otherwise you’re shooting through a dirty, fingerprinted filter. Use one for “protection” only if you can state from what it is you’re protecting the lens. Salt spray? Yes, this might be an answer, but I live about 100 miles from the ocean and on the other side of a mountain range, and if there is salt spray here, protecting my lens will be the least of my worries.
8. 12 frames/second is better than 10/frames per second. In what way? Neither one guarantees you’ve caught the peak moment. Consider this: let’s assume a shutter speed of 1/1000 second. 12 frames/second captures 12/1000 of the action, and misses 988/1000 of it. Holding down the shutter button at the highest frame rate yields lots of images, but not necessarily the one you wanted.
9. Always underexpose a half-stop to richen the colors. Intentional underexposure with digital cameras is one of the worst things you can do. It simply adds noise.
10. Professional photographers get all their equipment free from the camera manufacturers. Boy, do I ever wish this were true, but it isn’t. For that matter, I wish it were true for cars and houses also.
11. All information on photography forums is true. You might remember back when there was an actual discussion about using Scotch® tape to clean camera sensors. I’m fairly sure someone fell for this, and actually tried it. We all know that it’s not Scotch® tape you should use, but duct tape, right? (Well, I read about using duct tape on the Internet, so it must be true.)
CLICK HERE to check out John Shaw’s blog.
Exposing to the Right… the FAR Right.
By John Shaw
If you’re a RAW shooter you should already know about ETTR, Expose to the Right. The theory behind ETTR is that the best image capture for the most possible information is when the histogram is pushed to the right, to the “bright” side. Just keep adding exposure until that histogram is over to the right side of the graph.
OK, but how far to the right? You definitely don’t want to clip the highlights. DSLR cameras have a clipping warning display, the “blinking highlights,” or “blinkies” as they are commonly called, which shows up on the camera’s LCD. Many cameras will even display the blinkies for each individual color channel, besides the composite luminosity. But remember that the image displayed on the LCD is not the actual RAW file; it’s a jpeg thumbnail created on the fly by the camera. Camera manufacturers have coded in some headroom with the blinkies, as they don’t want customers to be angered at blown out highlights.
Fine. But I would suggest running a test to determine exactly what the correlation is between when the blinkies start, and the actual clipped highlights in the RAW file. You can easily run a test to determine this. Set your camera to Aprerture Priority, lock it firmly on a tripod, and aim at any scene. Increase exposure until the first blinkies appear. Note this frame (probably the easiest solution would be to delete any previous frame you shot to get to this point). Now shoot several more frames, using Auto Compensation to add 1/3 stop to each successive frame. Open this series in your RAW file software, such as Lightroom or Adobe Camera Raw, turn on the clipping warning in the software, and check each frame. I’ll bet that the starting frame, the one the camera blinkies said was clipped, is actually not clipped at all. In fact, you might be surprised at just how much headroom you have. With my particular Nikon D800E and a medium toned test subject, I have to add 1.3 stops beyond the blinkies before the RAW file has clipped highlights.
So what’s the point of doing this? Why worry? Well, with digital capture, noise lives in the dark exposures. If you want the best possible data, start with the best possible exposure. With my particular camera I’ll add some extra exposure whenever the subject is such that I can, especially when working at higher ISO values where noice is always a problem. Recently I shot a landscape at ISO 1600. I shot at both the metered ETTR exposure, and at my “extra 1.3 stop” ETTR settings. The difference was remarkable. The first image needed noise reduction. When I looked at the second shot, the one when I had added 1.3 stops, the image on the LCD appeared almost washed out. But when I reduced the exposure in Lightroom (my standard RAW file software), all the noise was gone. In fact, my tests suggest there is even a slight difference when the camera is set at base ISO 100, where I use the camera the most.
Does this really matter? The answer depends on how compulsive you are about quality, the realities faced in the field, and on how the photograph is to be used. Just remember, ETTR is for RAW capture only. And you don’t want to lose an image by blowing out the highlights. There are indeed some scenes with the highlights already maxed out.
Once you know how the blinkies in your camera correlate to the actual RAW histogram, a simple and safe solution — particular for static subjects such as landscapes – is to set your camera to bracket another frame that is 2/3 stop more exposure than the ETTR histogram on the LCD. When I shoot with my D800E, I know that I’ll be adding that extra bit of light whenever I can.
John Shaw is one of the most highly respected nature photographers in the world, and Visionary Wild is proud to include him among its instructors.
Visionary Wild supports the Sandy Hook School community
In memory of the innocent lives lost at Sandy Hook School in Connecticut, Visionary Wild has pledged to donate 5% of all new workshop enrollment fees received between December 15, 2012 and January 31, 2013. Funds will go to support organizations providing counseling and other vital services to the children, families, and staff of Sandy Hook School. If you are looking for ways to help but aren’t able to join us for a workshop, Newtown Youth and Family Services is a worthy charity that is presently providing much needed services to that heartbroken community.
Private: Jack Dykinga Interview
This Arizona Public Television interview with Jack Dykinga really captures what he’s all about.
John Shaw Interview
Visionary Wild instructor John Shaw talks about his forty year career in natural history photography, describing how he got hooked on photography, what keeps him inspired, and a little about his workflow.
Inside a Visionary Wild Workshop
In January 2012, photographers Jack Dykinga, John Shaw, and Justin Black collaborated on our first Vision Workshops at Santa Catalina State Park in Oro Valley, Arizona. Cinematographer Austin Andrews joined the group for a few field sessions in an attempt to capture the experience. Jack, John, and Justin are returning to Santa Catalina State Park for two more Vision Workshops in February 2013.
Special Trips: High Sierra and Africa

On occasion, we offer special photo expeditions outside of the “regularly scheduled programming” listed in the Workshops section of this website.
This September 20-26, we are offering a photo trip into the beautiful alpine High Sierra backcountry west of Bishop, California, for a small group of nine participants. The instructors on this trip are renowned Sierra Nevada landscape photographer Jim Stimson, and Visionary Wild’s Justin Black. Our good friends Mike and Tess Anne Morgan of Bishop Pack Outfitters will support the trip with expert mule packing service to carry all our gear into and out of the mountains, and guided riding mules to carry us! Our expert backcountry chef and camp manager will take care of meals so we can focus on photography. CLICK HERE for more information from our online newsletter.
“The Sierra Nevada has been my backyard and playground for over 35 years. There are few landscapes on the planet that are so gloriously appointed with soaring granite spires, crystal clear lakes, vibrant green meadows, rich beds of flowers, and autumn splashes of color, so I consider myself very fortunate to call the Range of Light my home. I enjoy the inspiring challenge of photographing the grand landscape or the intimate details at my feet. It’s one of the best places I can think of for an adventure with a camera.” –Jim Stimson

African Safari: Etosha – Chobe – Victoria Falls
June 3-20, 2013, we are offering a wildlife-oriented African Safari led by Justin Black for an even more intimate group of five photographers to visit Etosha National Park in Namibia, Chobe National Park in Botswana, Victoria Falls, and cheetah and white rhino preserves in South Africa. As of June 30th, 2012, only two spaces remain available. Our group will work with some of the best guides in the business and will use new, heavily customized safari vehicles at Etosha, and a highly specialized six-seat photo boat on the Chobe River. These platforms offer the best photographer positions available anywhere in Africa, with each photographer having his or her own 360-degree rotating photo chair with 360-degree revolving camera mounts that make working with big lenses a breeze. To top it off, we’re providing loan of big glass through Nikon South Africa, so you don’t have to lug it to Africa with you. CLICK HERE for more information.
Yucatan Expedition Report
Our January 2012 Yucatan Expedition was a great success thanks to the contributions of leader Jack Dykinga, our excellent guides Alfredo Medina and Sara Fuentes, and a superb group of participants. After meeting the group in Merida, we were welcomed by the friendly staff of Hacienda Itzincab-Cámara, a beautifully restored and updated 19th-century estate with lush tropical gardens an ancient Mayan pyramid rising just behind the main house. The hacienda served as our private base camp as we visited several stunning cenotes and caverns, working as a team to light paint the interiors when darkness prevailed. Once we had finished photographing, the cool, turquoise water of the cenotes often beckoned us to cool off with a swim. For the last two days, we made our way west to the Ria Celestún estuary, and made excursions by boat to photograph the flamingo colony, numbering in the tens of thousands. The following gallery of images were all made on the trip. We’re going back in January 2013, and we hope you’ll join us! CLICK HERE for more information or to register.
Jack Dykinga has written an article about his experiences exploring and photographing Yucatan’s cenotes, published in the June edition of the LiveBetter newsletter on the Center for a Better Life website.


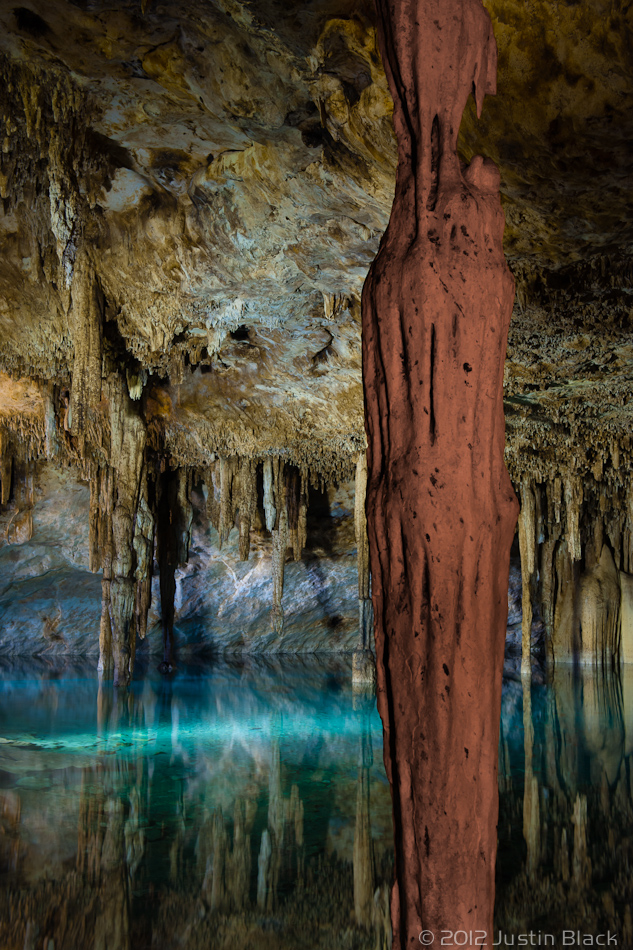
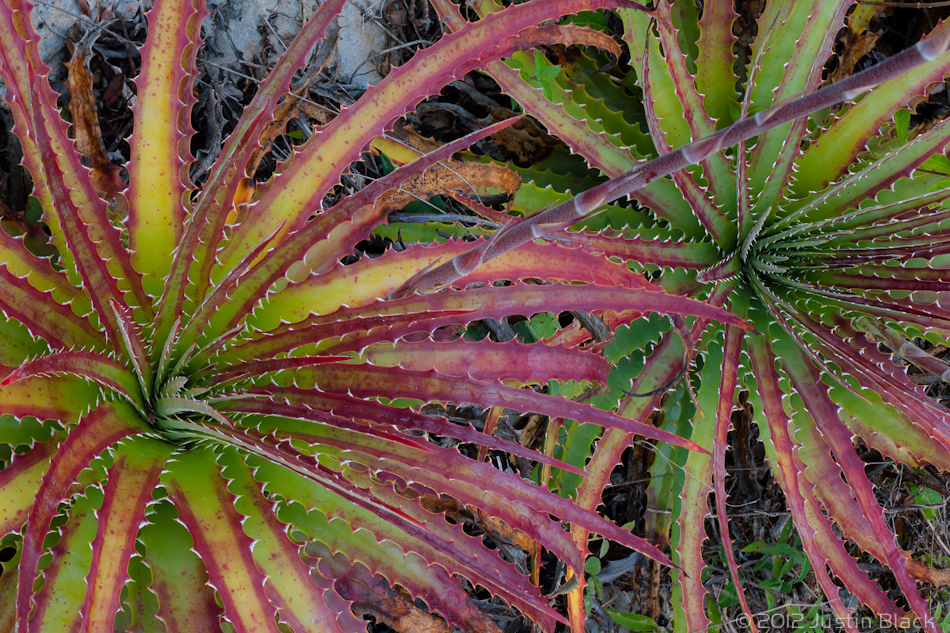
Grand Canyon by Raft Trip Report
On May 13th we completed our ten-day, 226-mile raft trip down the Grand Canyon, that I led with Visionary Wild instructor Jack Dykinga. An amazing group of ten clients plus our superb AZRA boat crew, Randy Tucker and Katie Proctor, made the trip one of the best we’ve ever done. Drawing on insights gained on earlier trips down the Colorado River, we were able to pull off a phenomenal itinerary, including some well-known Grand Canyon highlights and some little-known spots that are nevertheless a photographer’s dream come true. All of the images in the following gallery were on this trip. Participant Chuck Turner has written a series of excellent blog posts on the trip, which you can read by CLICKING HERE.
On our last day on the river, our intrepid raft guide Katie Proctor kindly shared with us her original poem about the lingering impact of a Grand Canyon raft trip. She left most of us crying tears of joy. Katie has kindly permitted us to reproduce it here, and it appears below the image gallery.
We are planning another Grand Canyon raft trip for the second half of September 2013, and we invite interested parties to contact us at info@visionarywild.com to be added to the waiting list. We hope you’ll join us! –Justin Black
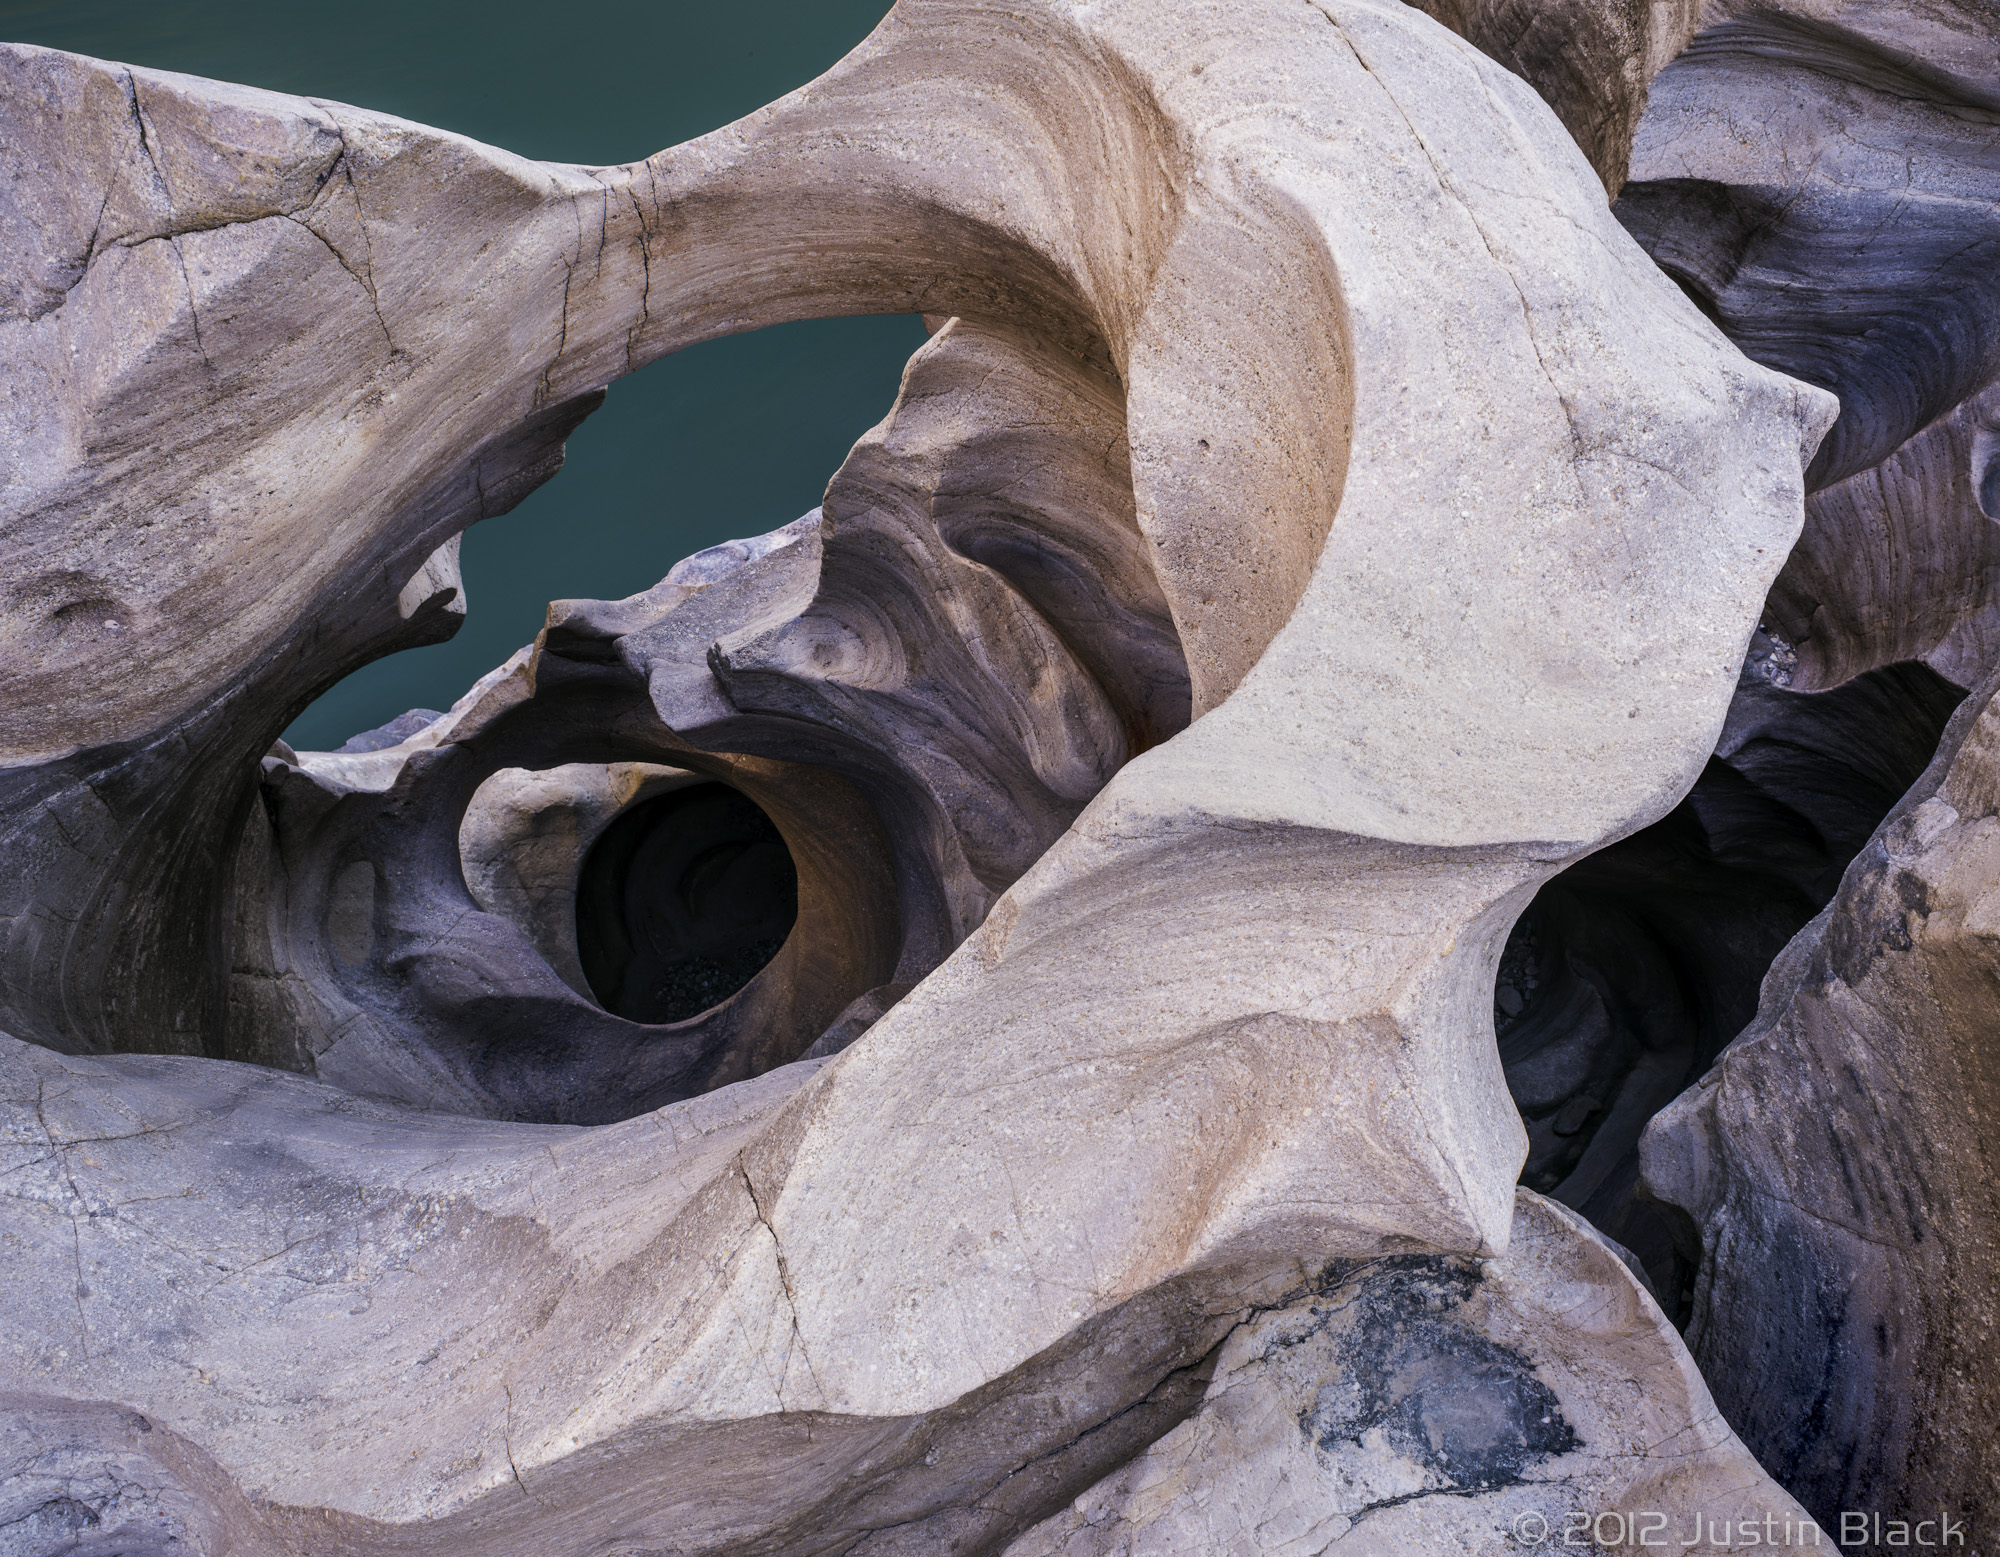
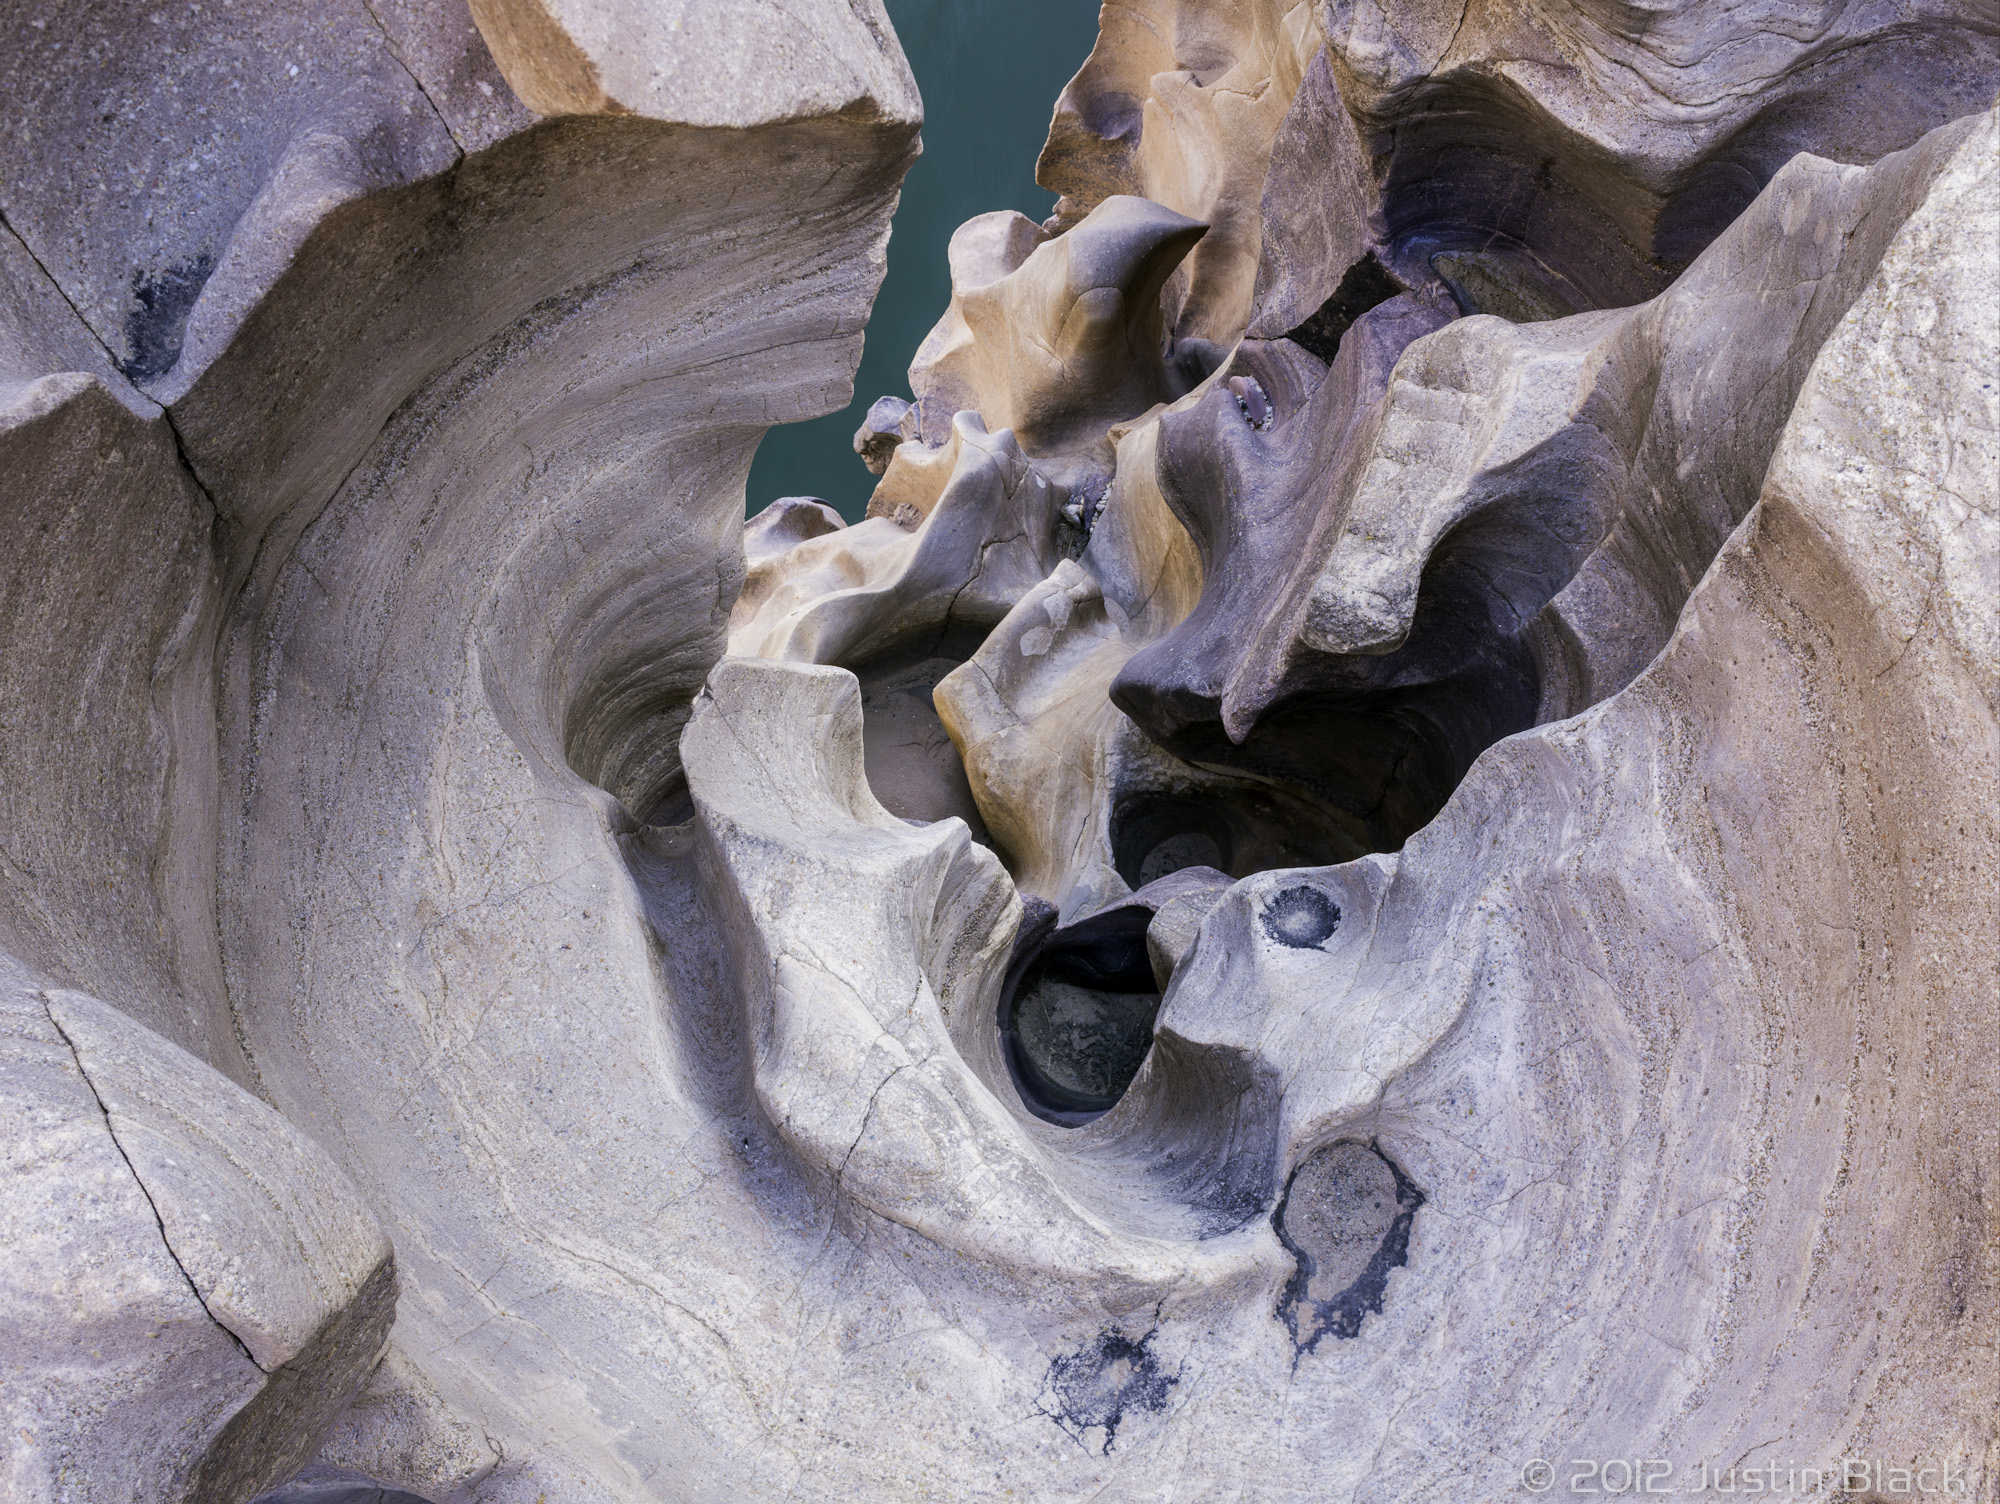

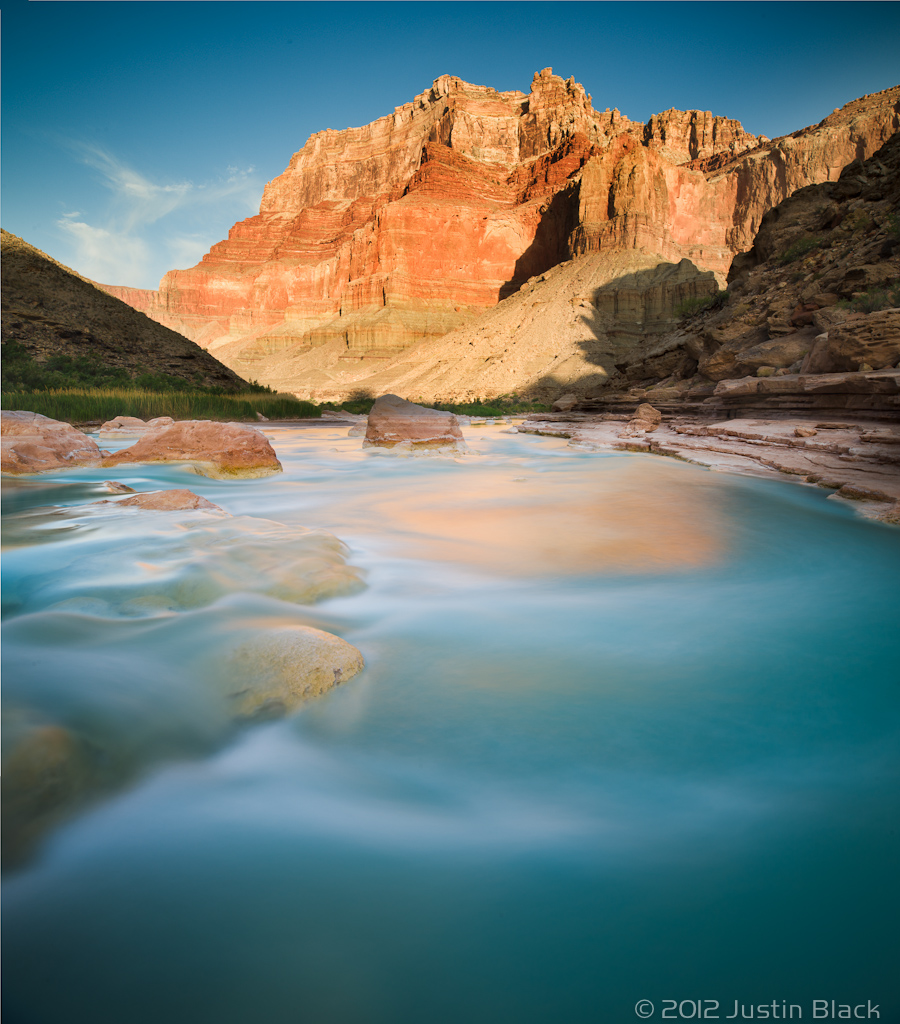
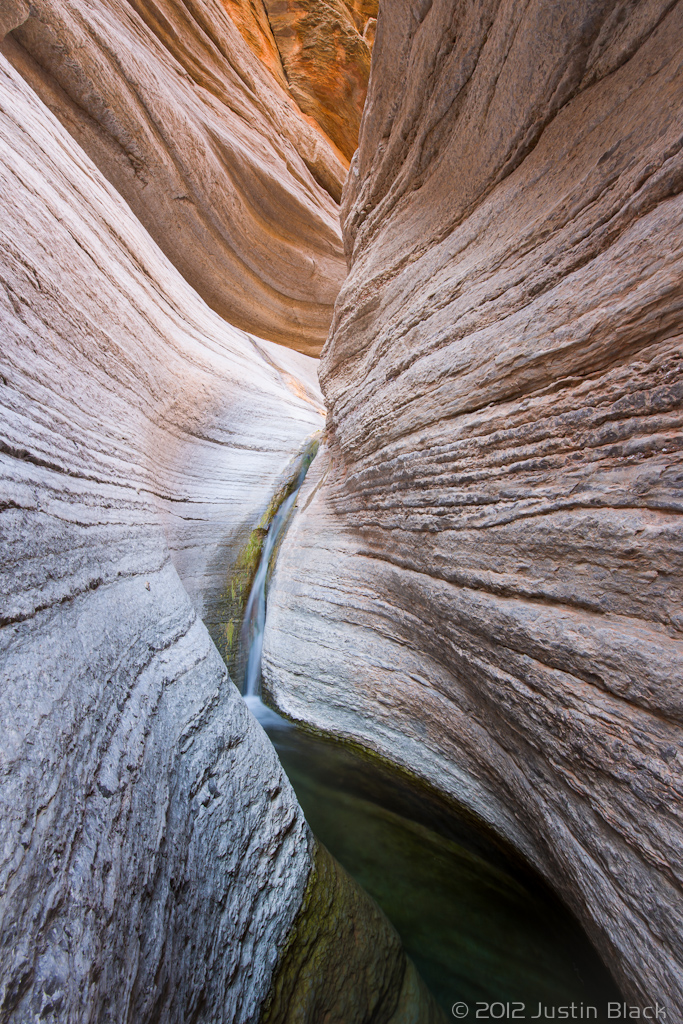
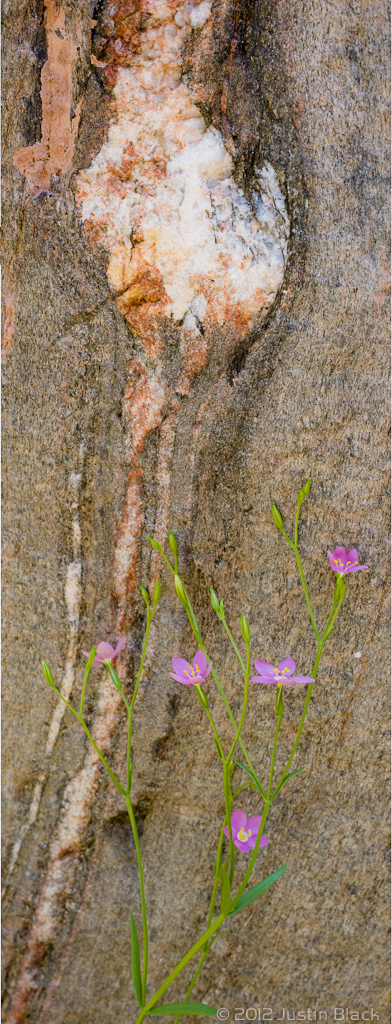
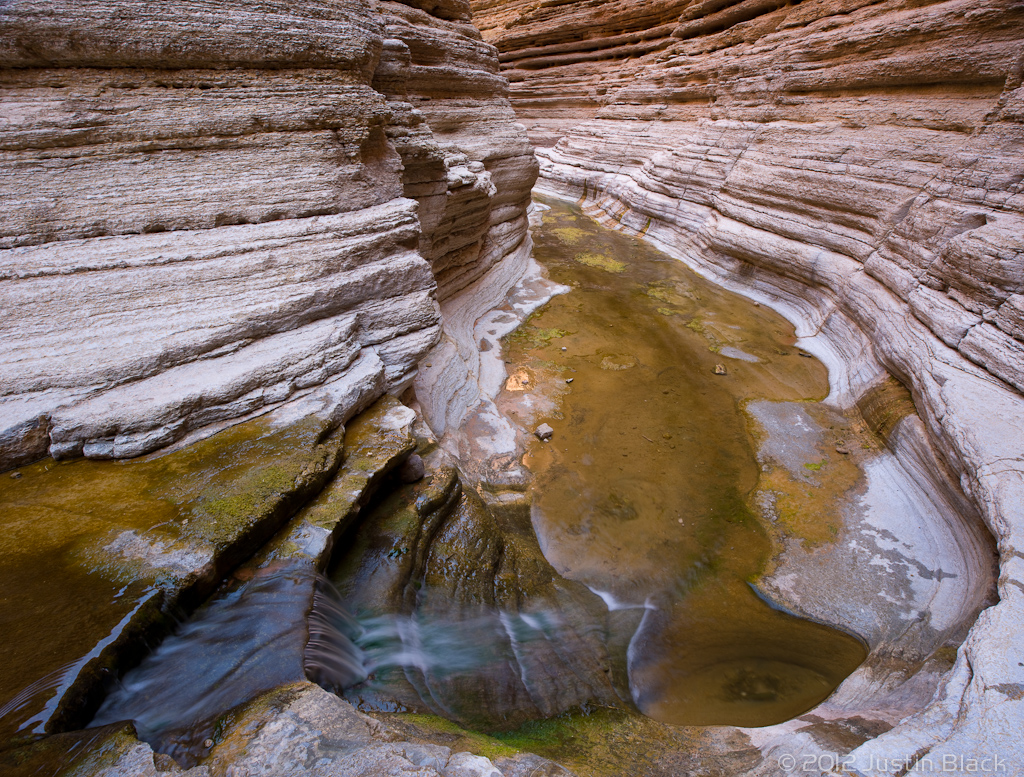
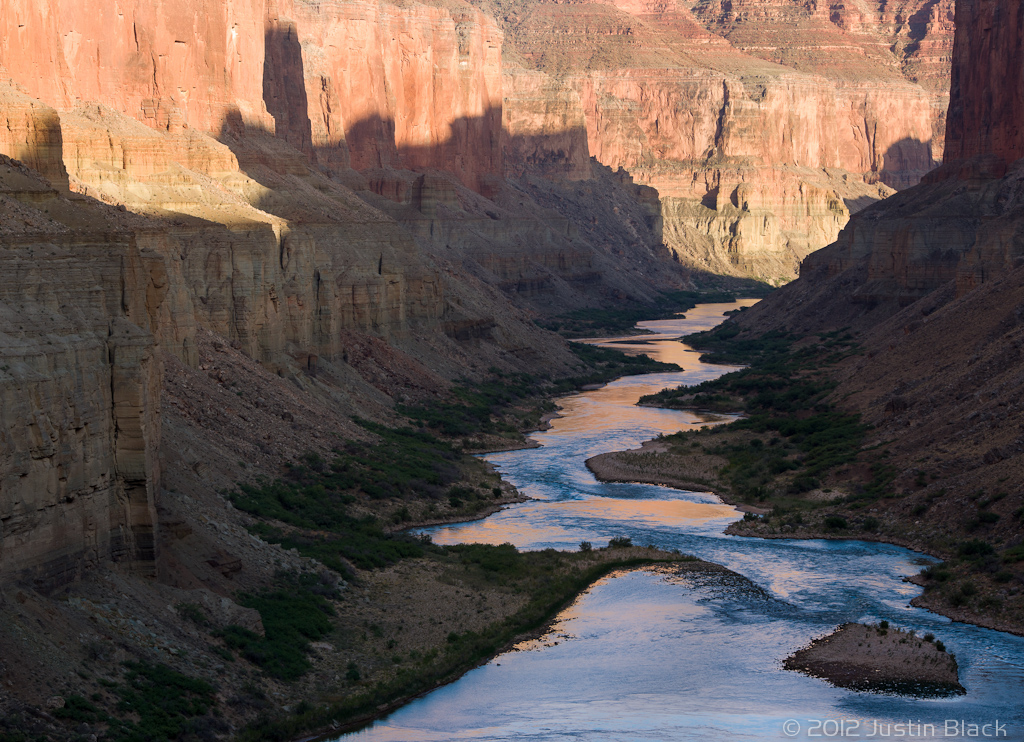
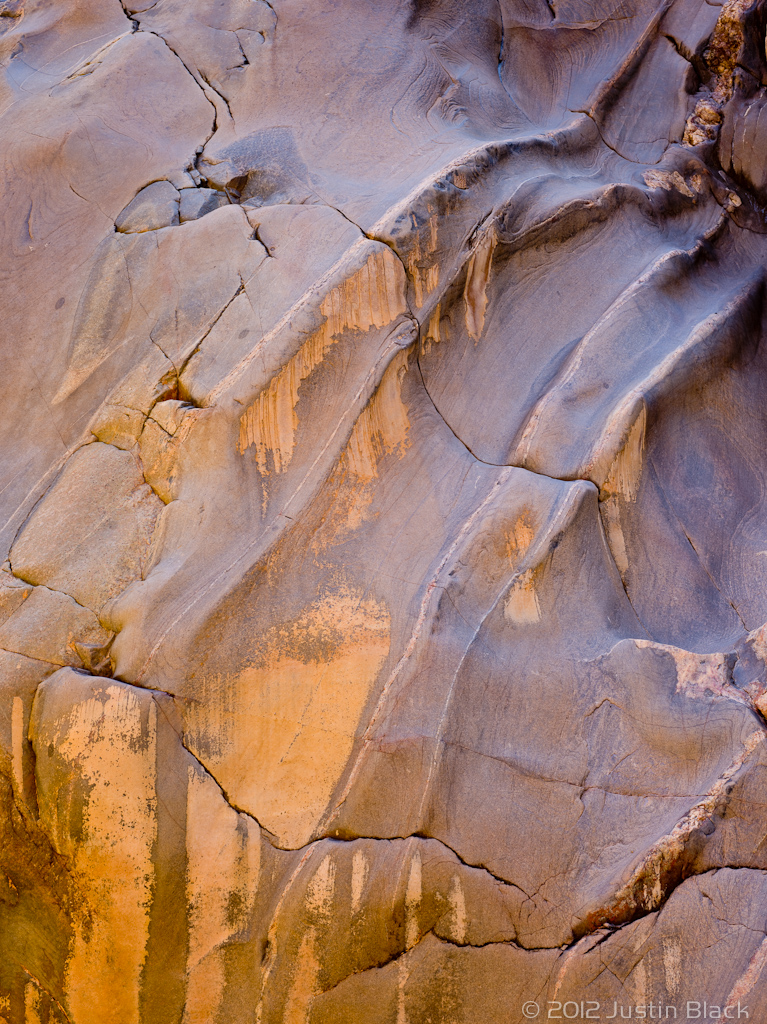
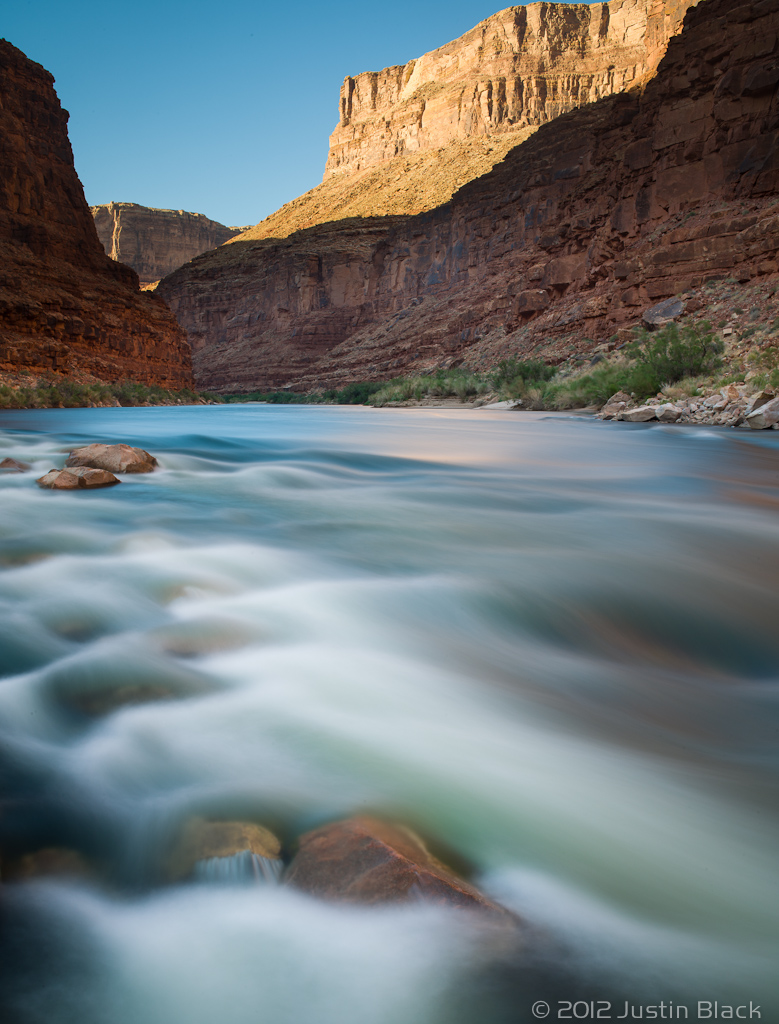
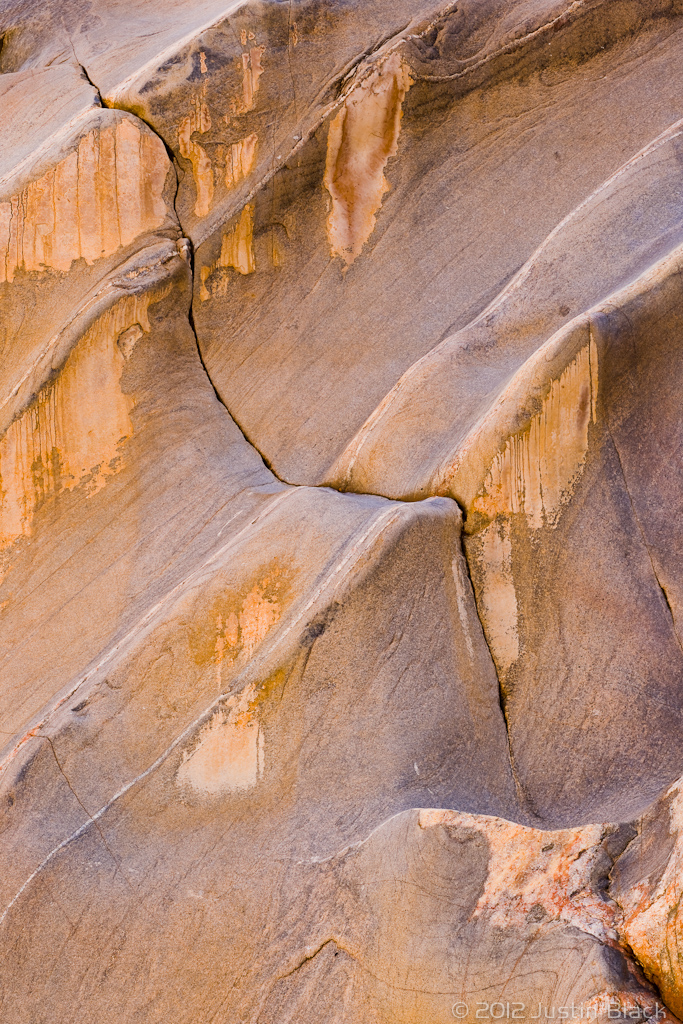
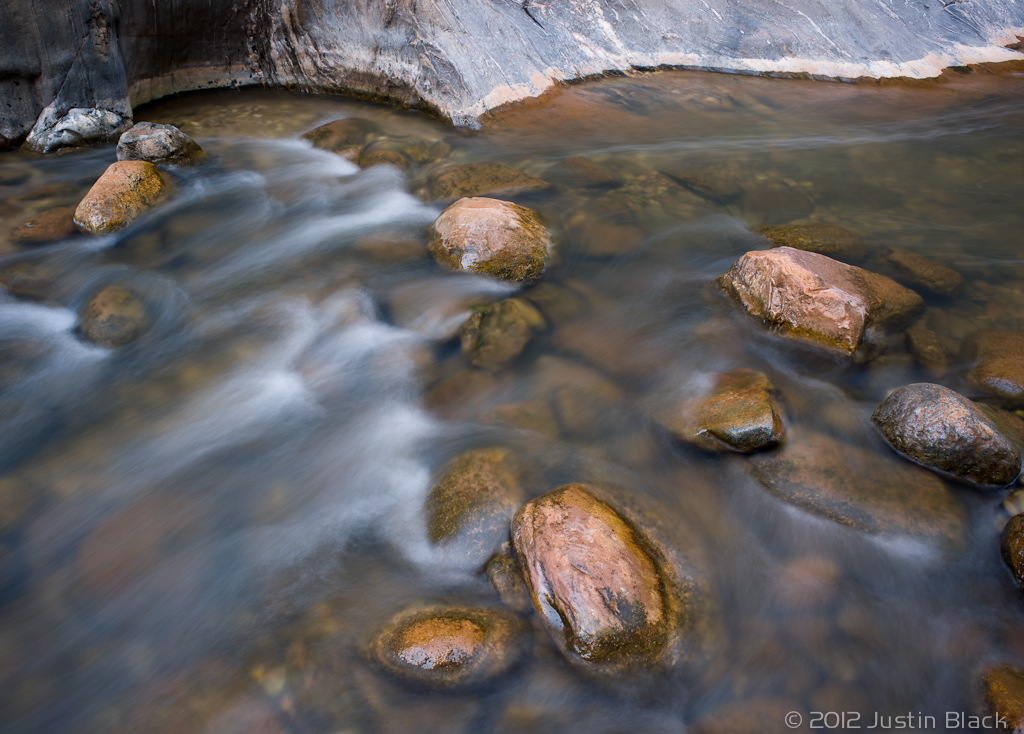
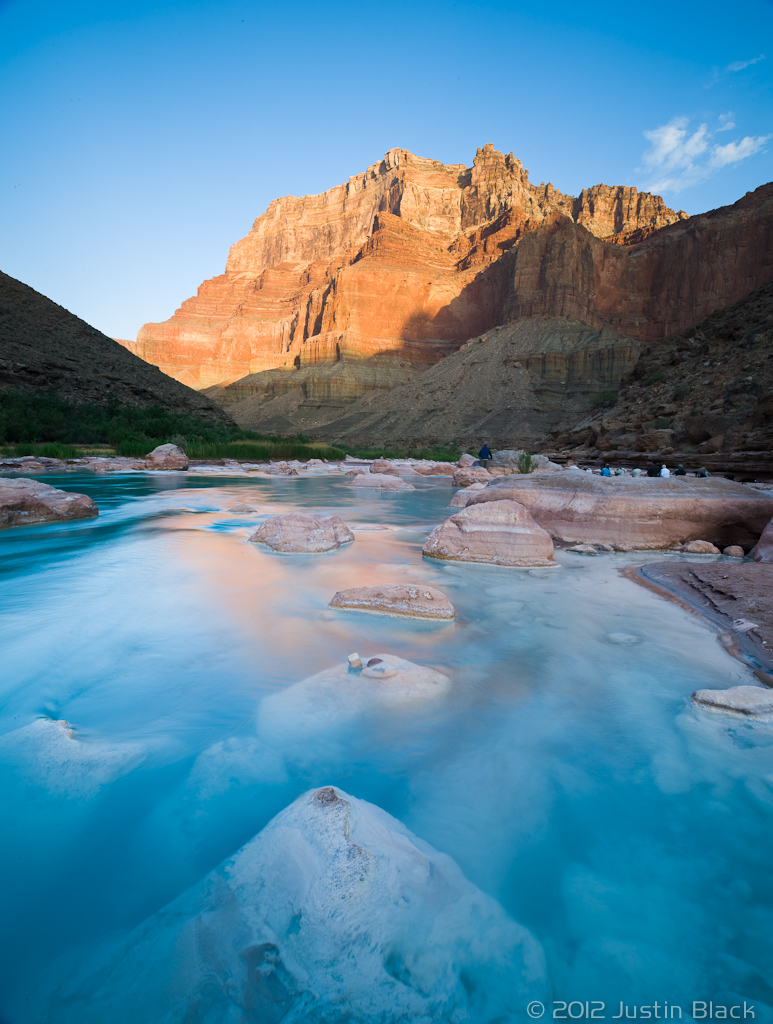
Raven Awaits You
by Katie Proctor
You were there
You newly fashioned Cowboys and Cowgirls
Where Water blasted over Rock,
careened through narrow canyons
and seeped quietly down salmon colored stone.
You were there
Mouth agape in a kind of “Rock shock,”
looking at ancient wise Rock.
You got the suspicion that all the commitments and deadlines you thought so
mightily important
were embarrassingly trivial.
At least for now.
And now is all there is.
You were there
when you realized this place was not magic.
Its real!
Its affects, real!
Reality doesn’t hold a candle to the realness of this place.
You were there
in this place where clean becomes relative
dryer sheets ineffective
and the scent of your own self
familiar.
You were there
when the boat soared up
and crashed back down
water blasting
in your face
in your ears
up your nose
in the crevasses between your neck and jacket
down your pants
up your legs
down your throat
tousled your hair
wiped you clean
took your inhibitions with its cascade
released you of your droning thoughts,
the web of anxiety cramping your heart,
your steadfast visions and plans for the future.
Washed clean your idea of “The Way Things Ought to Be” and left you
There.
Here.
Alive and smiling.
You were there
when subtly, slowly
Rock revealed to you that something so solid and still
can move you.
Be moved.
You can move mountains.
You were there
in Rock’s presence when your power scattered and just before you uttered the word
to your friend that these walls make you feel “small”, “insignificant”
you remembered your place.
you may have previously thought that your average size footprint didn’t matter
much at all in this Grand Scheme.
But now,
Clarity.
These same Rocks will be a witness to your impact for a millennia
after the short decades you were here.
You were there
when the question was posed to you
from the silently serious Rattlesnake
from the peering and ponderous Big Horn
What will you do with your great power friends?
What did you leave?
How did you love?
What did you learn when the stars poured down through that sliver above and
invited you
beckoned you
To open your eyes and your soul?
When you think you are insignificant remember the stars are bearing witness to
your one miraculous life
Rattlesnake is watching.
Coyote waits to see.
You were there
When you realized that this was more than a check marked off your “bucket list.”
Eventually that crumpled article torn from that Magazine’s “Top 10 Things to Do
in North America”
will be
thrown away.
The Transformation has occurred.
And you will feel
even from far away
in an office building in a distant metropolis
under florescent lights at the supermarket
or in that space between breaths when you crave Earthy connection.
You will know.
Raven awaits.
Perched among soaring walls and quiet pools.
Near pink sand beaches and quavering Evening Primrose.
Hermit rolls.
Lava thunders.
Blacktail waits in stillness.
You were there
You are here
Be moved.
Move gently.
© 2012 Katie Proctor. All Rights Reserved by the author. Reproduced here with permission.
Expedition Report: Arizona Overland

Around the campfire, Visionary Wild Arizona Overland Expedition. © Justin Black
There is nothing like exploring sublime landscapes with a group of friends who share a love for photography and wide open spaces. Immediately after the Thanksgiving holiday, Jack Dykinga, Jeff Foott, and I led a week-long overland photo expedition with nine other passionate photographers, visiting some stunning backcountry areas in northern Arizona. As the guest of a gracious Navajo elder, we first explored and photographed a very special location characterized by dramatic red rock sandstone hoodoos and dinosaur footprints 200 million years old. We then traversed over twenty miles of sandy 4WD jeep trails to one of our very favorite Colorado Plateau locations, a photographer’s paradise of swirling petrified sand dunes, intimate abstract designs, and grand vistas overlooking the Grand Staircase leading down to the Grand Canyon. Our merry band was joined by Chris Collard, Editor-in-Chief of Overland Journal magazine, Laurie Rubin of Nik Software, and Tom Hanagan of Four Wheel Campers.

Visionary Wild photographers, Arizona Overland Expedition. © Chris Collard
The days were so full of photographic opportunities that many of us had to force ourselves to take a break in order to get some food and a nap, and the photography didn’t end at dusk. Working by the light of our headlamps, we set up Nikons with MC-36 intervalometers to shoot five-hour multi-exposure star trail images, the results of which can be seen in Jack Dykinga’s stunning image in the gallery below. After a week of intense photography and fulfilling camaraderie, we exchanged hugs, said our farewells, and set off toward home.
The Arizona Overland Expedition was a prototype, testing a model for more overland adventures to come. Stay tuned for exciting overland trips in 2012.
–Justin Black
Here are some highlights submitted by the group.

Evening light on hoodoo garden, Navajo Nation, Arizona. © Julie Furber

Colorado Plateau, northern Arizona. © Sean Stuchen

© Sean Stuchen

© Ed Kenney

"The Beast." © Laurie Rubin

© Wally Reichert

Teamwork while photographing 200-million-year-old dinosaur footprints. © Chris Collard

Dilophosaurus dinosaur tracks, 200 million years old. © Jack Dykinga

Hoodoos beneath the Milky Way. © Jack Dykinga

Colorado Plateau details. © Jack Dykinga

Petrified sand dune sculpture, Colorado Plateau, Arizona. © Justin Black

Morning on the Colorado Plateau, Arizona. © Justin Black

Hoodoos in last light, Navajo Nation, Arizona. © Justin Black

Moon over hoodoos, Navajo Nation, Arizona. © Justin Black

Sandstone sculpture, Colorado Plateau, Arizona. © Justin Black

Petrified sand dune detail, Colorado Plateau. © Jeff Foott

Eroded sandstone "fins," Colorado Plateau. © Jeff Foott

Visionary Wild Arizona Overland Expedition. © Chris Collard
Grand Canyon by Raft: Multimedia
This video featuring photographs by Jack Dykinga and Justin Black from previous Grand Canyon raft trips captures the beauty, majesty, and intimacy of a photographic adventure in the canyon. Add marvelous camaraderie and bit of adventure and you’ve got an experience you’ll never forget!
Click here for details about our Grand Canyon by Raft trip, May 3-14, 2012
Daniel Beltrá wins Wildlife Photographer of the Year Award at London gala
At a gala event in London sponsored by Veolia Environnement, Visionary Wild instructor Daniel Beltrá has won the 2011 Wildlife Photographer of the Year Award for his image Still Life in Oil, a striking shot of eight brown pelicans rescued from the Deepwater Horizon oil spill in the Gulf of Mexico in June 2010.

Beltrá made the photograph at an ad hoc bird-rescue facility on the Louisiana coast. ‘Crude oil trickles off the feathers of the rescued brown pelicans, turning the white lining sheets into a sticky, stinking mess. The pelicans are going through the first stage of cleaning. They’ve already been sprayed with a light oil to break up the heavy crude trapped in their feathers,’ Beltrá explained. A statement from the judging panel described the image as ‘a strong environmental statement, technical perfection and a work of art all rolled into one. The sheer simplicity of this powerful image makes it really beautiful and shocking at the same time’
The international judging panel of respected wildlife experts and nature photographers reviewed more than 40,000 entries from aspiring amateurs and established professional photographers from all corners of the earth. As a sign of the competition’s growing international reach, this year saw first-time submissions from countries as far afield as Cambodia, Moldova, Brunei and Kyrgyzstan. There was also a notable increase in photographs submitted from countries such as India, China and Russia.
Now in its 47th year, the competition is owned by the Natural History Museum and BBC Wildlife Magazine and is sponsored by Veolia Environnement. It is internationally recognised for taking a lead in the artistic representation of the natural world and continues to be held in high esteem with a reputation for being the Oscars of the wildlife photographic calendar.
The winning images will be featured in an international exhibition beginning at the Natural History Museum, London, on Friday 21 October
This important photograph is presently touring as part of Beltrá’s exhibit, Spill, at the Long Beach Aquarium in California, and at Roca Gallery in Barcelona, Spain. Limited edition prints are avaible as follows:
Oil Spill #20 – Still Life in Oil
2010
Chromogenic Print
Limited Editions: Mounted Size: Price:
8 48 x 60 $10,250
10 40 x 48 $5,500
15 25 x 30 $3,500
Prices are for unframed, museum quality mounted, archival prints.
Shipping and sales tax not included. For more information and edition availability, contact Susan Newbold at danielbeltra.studio@gmail.com.
Iceland Expedition Video
Visionary Wild instructor, Polar explorer Chris Linder produced this stunning video featuring his photographs from his latest expedition to Iceland this past August with Woods Hole Oceanographic Institute researchers. Chris and landscape photographer Justin Black will lead a photo expedition for nine passionate photographers August 12-19, 2012, which will visit Iceland’s puffin colonies, coastal landscapes, glaciers, iceberg-filled bays, and dramatic volcanic interior. Click here for more information about this exciting expedition!
Photographing with Purpose
The November 2011 issue of Outdoor Photographer magazine features an article by Justin Black about ways to add greater meaning and purpose to your photography. You can read the full text and see the accompanying photos here:
Photographing with Purpose by Justin Black

Snow-covered bristlecone snag in the Schulman Grove, Inyo National Forest, White Mountains, California
Visionary Wild instructor Chris Linder releases new book: Science on Ice!

“Polar exploration is at once the cleanest and most isolated way of having a bad time which has been devised,” wrote Apsley Cherry-Garrard of his time with the 1910 Scott expedition to the South Pole. And that’s how most of us still imagine polar expeditions: stolid men with ice riming their beards drawing sledges and risking death for scientific knowledge. But polar science has changed drastically over the past century—as Chris Linder shows us, brilliantly, with Science on Ice.
The result is a combination travel book and paean to the hard work and dedication that underlies our knowledge of life on earth. Science on Icetakes readers to the farthest reaches of our planet; science has rarely been more exciting—or inspiring.
Review of Science on Ice:
“Science on Ice gives the reader a glimpse into the challenges of conducting field research in the extreme and isolated environments of the Arctic and Antarctic. I came away with a new appreciation of both the risks and adventures scientists experience, the creativity and adaptability they must possess to work in difficult conditions, and most of all, the fact that they are normal human beings with a strong sense of curiosity that fuels their work. This book will help us understand these distant reaches of our world, and] it has enormous potential to spark the minds of future would-be scientists.”—Amy Gulick, photographer and author ofSalmon in the Trees: Life in Alaska’s Tongass Rain Forest
http://www.press.uchicago.edu/ucp/books/book/chicago/S/bo8968738.html
Exposure Modes: Is Program OK?
A question recently came in asking if it is ok to use the camera’s program mode, as opposed to manual, aperture priority, or shutter priority. Other than being bound by the laws of physics, there is little or nothing in photography that requires orthodoxy, “right” or “wrong,” “ok” or “not ok.” Shooting in Program mode is fine if that’s how the photographer chooses to shoot and if it doesn’t get in the way of making the envisioned photograph. As with any photographic tool or technique, however, I’d always recommend that the photographer understand what the camera is doing and be able to express the reasons he or she is choosing to use that particular mode over another one.
I primarily do landscape work. Back in the days of shooting color transparency film, virtually all of my work was spot metered and shot in manual mode, because film was unforgiving and that level of careful precision was how I achieved the best possible results. Now, with digital, the way the medium responds to light is different, so calculating optimal exposure is different. The color Matrix meters these days are quite good at evaluating not only overall luminance, but also the tonal range of each color channel (red-green-blue), so they have certain advantages over traditional metering methods when it comes to exposing to match the performance of the sensor in the camera. We are also able to confirm the exposure we want with the histogram, so for many types of photography there is a good argument to be made that shooting in an automatic mode makes the most sense most of the time. It is always possible to bias the exposure one way or the other using exposure compensation, and to shift shutter speed and aperture as desired.
There are certainly exceptions, but since going [almost] all digital, I am mostly using aperture priority, auto white balance, and Matrix metering. I shoot RAW 100% of the time, expose for maximum data/minimum noise (biased toward overexposure without clipping color channels, otherwise known as exposing to the right), and set correct tonalities, color balance, black point, etc. in post processing. I could achieve the same results in Program mode, but it would require the extra step of shifting the exposure to the aperture or shutter speed I wish to use.
At the end of the day, it’s important to identify and understand a simple set of camera settings, tools, and techniques that are legitimately helpful in making the images you want to create, and then concentrate your attention on concepts, themes, light, composition, color, and gesture. As a photographer, one of your goals should be to get the camera out of the way of your vision and creativity. –Justin Black
Being There
A new photography site called PhotographyTalk.com recently recruited me to serve as a professional contributor to their forums, and while browsing recent posts I came across a topic in one of the forums asking which is more important, the act of recording the original raw image or the post-processing necessary to create the final photograph that represents the photographer’s expression of the image. It got me thinking that there’s something more important than either of those options: the experience of simply being there.
Just being present to witness whatever it is we choose to photograph, even if no image is recorded, is of tremendous value. For instance, I tend to be out “in the field” before dawn only when I plan to photograph at sunrise, and I’m incredibly grateful that over the years photography has provided the motivation. The time I’ve spent out in the pre-dawn light watching the first rays of the sun play across the atmosphere and landscape is precious to me. I can’t count the number of places that photography has taken me, and I’d rather have those experiences and memories incorporated into my being than a set of perfect photographs but no memories or lessons learned. One of the greatest things about photography is that it encourages us to get out, look into the world, and be a part of events that we might not otherwise encounter.
Of course, I take for granted that every image for which I have a meaningful application will require some amount of work, be it basic RAW conversion or more involved Photoshop work, to prepare it for publication or printing. I also consider processing essential in terms of my expression of what I am trying to communicate to the viewer. So, yes, it is important, and as Ansel said (and I paraphrase) it’s like the performance of a musical score, but give me the personal memory of an exceptional moment in nature over a perfect finished print any day. In our long rush to master technology and technique, it’s important to remember to live life to the fullest and make the most of every new experience we’re fortunate enough to have.
–Justin Black

First light over the Owens River, Eastern Sierra, California, by Justin Black
Jack Dykinga Interview Slideshow
Jack Dykinga on Mark Godfrey Selects
Nature Conservancy Director of Photography Mark Godfrey recently interviewed Visionary Wild instructor Jack Dykinga for this multimedia slideshow featuring some of Jack’s best work.
Iceland: Expedition Scouting
 at Laetrabjarg in the Westfjords")
-
Atlantic Puffin (Fratercula arctica) at Laetrabjarg in the Westfjords
Polar explorer and photographer Chris Linder traveled to Iceland In mid-August with a group of fellow Woods Hole Oceanographic Institute associates, in part to scout locations for next year’s Visionary Wild expedition, tentatively scheduled for August 19 – 26, 2012. In the following report from the field, Chris has kindly shared his thoughts and a few images from the trip. Watch for details about the 2012 Iceland Expedition in the coming weeks.
 Misty mountains in Snaefellssnes National Park
Scouting Iceland
or… In the land of Gore-Tex and Speedos
by Chris Linder
As I lounged in a geothermally heated river watching the last rays of sunlight play across tan and maroon rhyolite hills in the Icelandic highlands, I pondered how to characterize a workshop here without resorting to the “fire and ice” cliché. Even after multiple visits to Iceland’s most photogenic destinations over the last ten years, I was about to concede defeat: the cliché has its merits.
 Rhyolite hills at Landmannalaugar
Iceland sits astride the Mid-Atlantic Ridge, where the North American and Eurasian tectonic plates are pulling apart. This causes the “fire”—geothermally active areas comprise nearly a third of Iceland’s land area (including the soothing pool I was relaxing in). This geothermal activity, manifested in steaming fumaroles, spurting geysers, and bubbling mudpots, is one reason why the Icelandic landscape has such an otherworldly beauty. Couple this heat with the “ice”—sprawling glaciers like Vatnajökull (the largest ice cap in Europe) and iceberg-filled lagoons, and there you have it… In my humble opinion, one of the most photogenic countries in the world.
 Crevassed glacier ice at Kverkfjall
This scouting trip was an intensive journey through nearly all of Iceland’s landscapes, from puffin-encrusted cliffs in the Westfjords to the remote and rugged Highlands. With our trusty Jeep Cherokee, my companions and I drove many kilometers of two-track and forded more rivers than I can count – most routes through the Highlands are not bridged.
 Crossing a river on the way to Landmannalaugar
14,000 photographs later, I’m ready to plan out an adventure in August 2012 for a select group of photographers to my favorite places in Iceland. Stay tuned to the Visionary Wild site for more details.
 Lake Ãskjuvatn in the Askja caldera
So what to do about the cliché? As I watched bathers scamper across the boardwalk to the hot spring under a spattering of cold rain, a thought came to mind: land of Gore-Tex and Speedos? I think I’ll have to keep working on it….
An Eye-Opening Twilight
by Justin Black
The very American artistic tradition of celebrating the concept of wilderness, associated so closely with photographers like Ansel Adams and Galen Rowell, reached an early zenith in the mid 19th century with the Hudson River School painters. Their work attempted to capture exceptional qualities of light, topography, and weather to render idealized visions – not always far from the truth – of sublime landscapes across the continent, from the Catskills to California, in which humanity is often permitted to be present but never dominates.
It is hard not to characterize the light captured with oil on canvas by the likes of Albert Bierstadt, Frederic Church, and Sanford Gifford as “photographic” while we often refer to comparable light in photographs as “painterly.” We still see and photograph similarly sublime scenes in wild areas across America today. A key difference is that the Hudson River School artists experienced a view of nature and our place in it that was entirely new, but our vision still works the same way theirs did 150 years ago.
In fact, this piece by Gifford once helped to open my eyes to the way we see and go about capturing images of the world around us.

His painting depicts three tiny figures on a frozen pond, with a fence line and shrubbery in the foreground, and a row of trees in the background. The trees’ bare branches are silhouetted against a colorful evening sky. Something about the way the artist rendered the highlights and shadows in the image seemed oddly familiar…
Back in the film days, frustration with the limited range of tones that photographers could capture led to the development of solutions like graduated neutral density filters that enabled us to easily balance differences in brightness between two or more areas of a composition. The apparent flaw of grad ND filters, however, has always been that when an object is itself entirely in shadow but crosses over from dark to bright backgrounds within the composition, the filter gives away its effect because the section of the object that is against the brighter background (the area being darkened by the dense part of the filter) ends up going black, while the part of the same object that falls against the shaded background (not being effected by the filter) shows good mid-tone detail.
In Gifford’s painting, objects in the area of shade at the bottom of the painting displayed good shadow detail, while the tops of the trees against the brighter sky and were painted as black silhouettes – exactly the sort of rendering I had seen time and time again in color slides made using a graduated neutral density filter. But the painter had never seen a color photograph, much less the effect of a grad ND filter, so why would Gifford paint the tops of his trees black when good detail is readily apparent in similarly illuminated subject matter within the scene?
Without resorting to complex darkroom masking, a film photographer attempting to render good color saturation in the bright sky behind the trees would have had no choice but to force the silhouette and the accompanying loss of detail in the branches. Gifford on the other hand, with the unrestricted palette of artistic freedom at his command, chose to paint the trees this way. It’s the way he visualized them and what looked most natural to him as he applied paint to canvas.
To put it simply, the silhouette of branches against the sky is precisely how he saw it – and how any of us would see – despite the fact that the light source for the illumination of the treetops is the same as that in the shadowy parts of the scene that he chose to paint a bit lighter and with good detail. This makes sense: when we look at an object illuminated by diffuse indirect light against a dark background, our visual system sees good detail in it. The same object illuminated by the same light but against a sufficiently bright background will look black as our visual system responds to the increased overall brightness. This is precisely the reason why, when used carefully, graduated neutral density can make an image look more like what we saw with our own eyes.
Fast forward to the present day. Finally, digital technology empowers photographers in the early 21st century with a degree of control and creative freedom comparable to that of a 19th century oil painter. In comparison, however, photographers have it easy – no need to sketch numerous detailed studies in the field for use as artist’s references in the creation of the final piece later, and no need to labor for weeks on end to complete a single finished work.
The tradeoff of course for our powerful digital tools is a greater burden of creative and aesthetic judgments. As wonderful as they are, all the array of technological tools at our disposal are only as good as the eyes and brains used to apply them. High dynamic range processing (HDR), for example, can create visually striking images, but the lure to routinely over process can be seductive. When technology guides the creative process rather than serving as a tool under the thoughtful control of the artist, we can experience more difficulty in aesthetically and intuitively accepting an over-manipulated photograph of a real scene than we do a naturalistic 19th-century oil painting of a scene that only ever existed in the artist’s mind.
HDR and other new tools are not the problem, but we are faced with an broader array of decisions that influence the quality, relevance, and character of our work. We take for granted the immense power of post-production tools that enable us to radically lighten and enhance detail in a shadow area – that back in the film days might have been rendered as pure black by default – while simultaneously rendering finely detailed bright highlights. We have the technology to do it, but one has to carefully consider when, how, and how much to use the tools in the digital toolbox, and whether each modification really serves the image. We can boost saturation and contrast of the most banal composition to the point that it grabs visual attention, but will it mesh with our visual intuition and actually hold up aesthetically over the long term?
Finding ourselves with complete and easy control over the color and tonal value of every pixel in every photograph we produce, photographic artists can enjoy the freedom of total creative license. Like a painter, we have the option to render the treetops as silhouette, or instead can choose to depict them as richly detailed mid tones against the same bright and vibrant background. Gifford conspicuously chose the approach that is more in accord with naturalistic visual perception despite his ability to have depicted it any way he wished.
In the context of a world filled with high-definition digital animation and fantasy photo-illustration, it is truer than ever that the most meaningful nature photographs will be those that inform us in some way about real nature and our relationship to it. These images may be spectacularly beautiful; they may reveal situations, phenomena, and juxtapositions in nature that seem unbelievable, uplifting, or devastatingly depressing; but the greatest power of nature photography stems from the trust that the image we find so compelling is also representative of another human being’s authentic experience.
Interestingly, A Winter Twilight doesn’t depict an actual event in time and space. Concealed by Gifford’s masterful rendering of light and tone is the fact that it is an imagined composite of real situations that he sketched in various locations and at all hours of the day rather than during the fleeting twilight depicted in the final painting. His highly tuned ability to see and visualize a final composition, however, enabled him to create a fairly convincing illusion of reality back in his New York studio. Though we photographers work on location and in the moment, we can still learn a great deal from the impressive visual intuition, understanding of light, and thoughtful aesthetic choices demonstrated by Gifford and other painters like him. As fast as the times, technology, and tastes may change, we share a profound connection with our antecedents through the human visual system.
Pro Tip from Jeff Foott: “Shooting the Scene”

There’s a story behind every image. A combination of visual cognition, emotional response, thoughtful investigation, composition, technical judgments, and timing (among other factors) play into the creation of the best photographs. It’s a process of purpose.
Visionary Wild instructor Jeff Foott recently shared with us a series of teaching images that he uses to as part of a lecture designed to shed some light on the process of, as he calls it, “shooting the scene.” While walking along a stream near his home in Moab, Utah, Jeff’s attention was captured by this frozen puddle among the rocks. His first reaction was to make a record photograph of the scene as he saw it at first glance – “frozen puddle among rocks” – isolated within the broader landscape.

Recognizing that it was the graphics, tones, and textures of the puddle itself that were what appealed to him visually, Jeff chose to make it a close-up, isolating the frozen puddle from the rocks.

The scene then became the puddle itself, and Jeff sought out compositions within it. He points out, “This is the kind of thing that you can shoot all day, looking for the new compositions and treatments. If you’ve got a great scene to work with, stick with it.” We would add that when looking for abstract close-up compositions, it can help to let go of preconceived notions of what the subject is supposed to look like. Be open to reframing the nature of the subject in new ways.

A good exercise in this sort of situation is to speak out loud what it is that you want to make a picture of, and then gradually modify that statement through a series of images. In this case, that statement started with the very literal “frozen puddle among rocks,” and ends with “abstraction of form, tone, and texture.”
All photos © 2010 Jeff Foott
Bioluminescence on the Sonoma Coast, by Jerry Dodrill
Bioluminescence
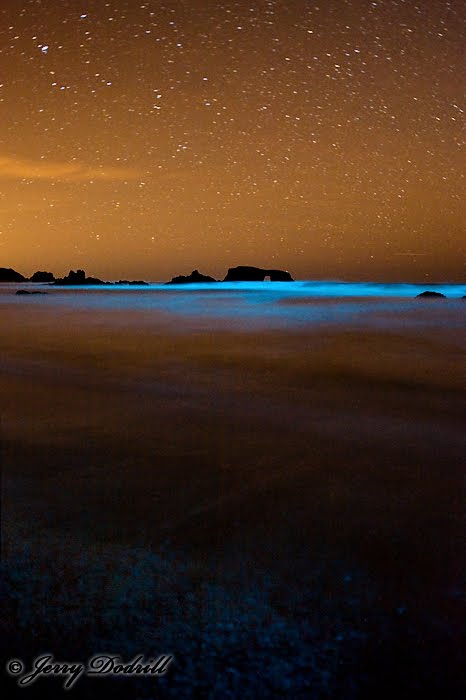 For years I’ve heard unbelievable stories about people’s surreal night time experiences in the ocean with glowing plankton blooms, but until recently I’d never seen it myself. The tip off came from Ellen Cruz, a friend from Bodega Bay who sent a note about an experience she’d just had on the Sonoma County coast:
…the ocean was illuminated as if under a black light…so awesome, cannot describe in words…no need to drop acid on this one…every white particle of wave was iridescent, florescent, glowing like you can’t believe…step on the sand and your footprint glows and sparkles… there were banks of waves coming in, white caps in the distance just glowed, and when the waves connected it was elongated strips of fluorescent green stripes across the water… whew…
This strange oceanic occurrence is likely the root of ghost stories told by early sailors who saw the mysterious green fire in the water but failed to comprehend what they were seeing. Documented as far back as 500 B.C., most bioluminescent light occurs in tiny plants called dinoflagellates which live in the sea and gain energy from the photosynthesis of sunlight. In darkness they emit a blue light in response to movement within the water. The intensity of the light peaks about two hours after dark and is simply amazing to watch. During the day they turn red and can be the source of the neurotoxin that poisons shell fish during Red Tides.
After receiving Ellen’s note, and being somewhat fascinated by natural optical phenomena, my mind immediately began pre-visualizing how I could make an interesting photograph. I often try to imagine best-case situations that might occur in nature. The trick is to carefully consider the conditions which would be necessary for a scenario to occur and then consciously reverse engineer it and attempt to put yourself on location at just the right time while being prepared to capture the moment. Something magical often ends up happening, even if it is somewhat different than what you had imagined.
As I pondered the complexity of making an evocative image of the psychedelic tides I felt that the images would look very alien if there wasn’t an earthly land form with which the viewer can easily identify. I started piecing together two ideas that I thought I could achieve in the same night. I’d seen the first sliver of a moon the night before, just after sunset, and knew that the next day it would be about fifty minutes higher in the sky. So I wanted to first make an image of the crescent moon setting at twilight above the breakers and Arched Rock near Jenner. The second image I was visualizing was a long exposure at the cusp of night where I would have just enough light to see the arch, and enough darkness for the dinoflagellates to show up in the water.
I checked the wunderground.com weather satellite which showed crystal clear skies, then double checked the angle of the moon relative to the arch by using a very useful software for such things called The Photographer’s Ephemeris. All the elements seemed to align and it looked like a promising evening.
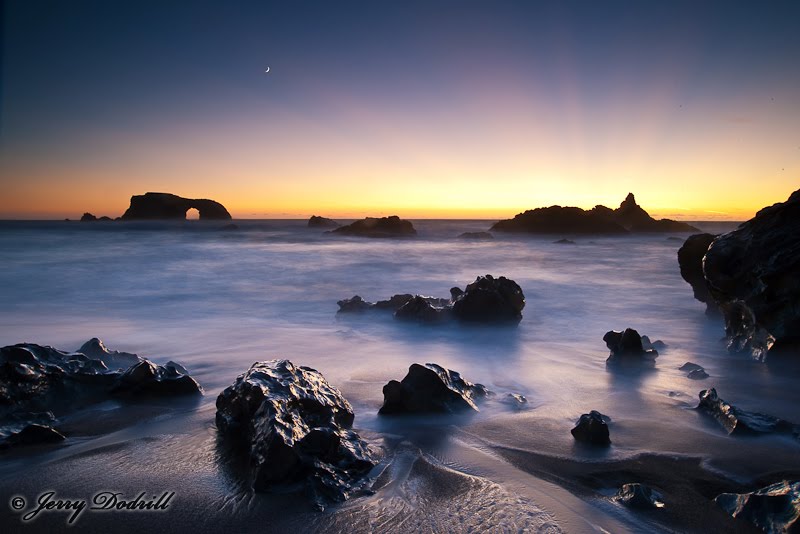
I pulled up at Goat Rock Beach in Sonoma Coast State Park right about sunset, (which-oops!- is when the Park closes), geared up in rubber boots and wind gear and headed south down Blind Beach in gorgeous light that I would normally have been shooting. This time I was on a mission for something more mysterious than a sunset but at one point I did stop and made a few exposures of boney rocks protruding from the sand with crazy beams of light coming over the horizon. This was an early and unexpected bonus shot. As the light diminished I came to where the convergence of the setting moon and the sea arch were just perfect.

The first set of images were exactly what I expected. In years past I’d made similar images here with the full moon setting at sunrise into the Earth’s shadow. What I didn’t expect this time is that my camera’s sensor was picking up the Milky Way directly above the Arch! This added a layer of intrigue to the image that was far beyond what I’d imagined. Soon the starry night was fully visible to the naked eye.
If the moon had been larger or higher I believe its light would have polluted the clear, cold night sky and blown out the reflection in the water. But it was just slight enough that the relative contrast between the starlight and reflections fell into a range which could be handled if I was careful. But it was the bioluminescence that was most incredible. Each waved rolled in looking like a million neon glow sticks had been dumped into them. The blue-green light shot across the breakers as they crashed, the more wave energy released, the more light emitted. The backwash on the beach left momentary trails of light which resembled a million little galaxies.
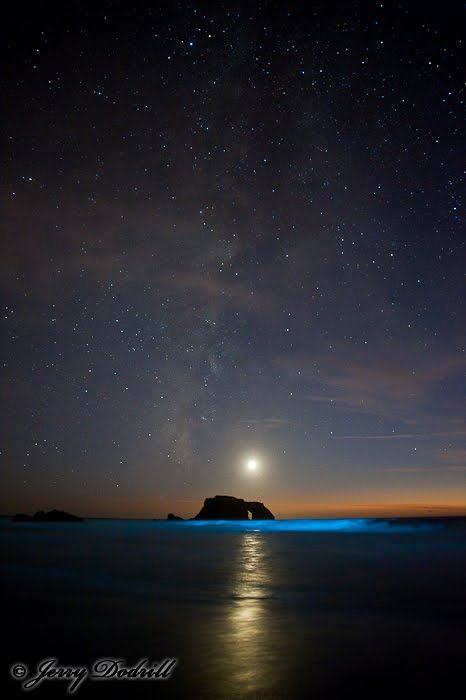
I was in “the zone” watching wave sets, adjusting exposures as it got darker and darker, moving south down the beach as the moon traversed to the north, trying to keep my juxtaposition with Arched Rock in alignment. It was a bit ridiculous to realize a shot like this had come together: crescent moon shining through the arch under the Milky Way with the glowing ocean. Then as if in a nod to affirm all was okay in the universe, I watched in awe as a brilliant shooting star streaked across the sky above the arch while I had the shutter open. All the while I was very aware that I should not have parked my car in the heavily patrolled parking lot.
The moon was finally setting so I packed and hiked across the beach toward the car, arriving just as two park rangers stepped out of their cruiser with spot lights on. “Hello!” I called out of the darkness in attempt to not get myself Tazed as I stepped into the blinding beams with a big tripod on my shoulder. I received the full lecture from them (the park closes at sunset…we don’t want to have to come looking for you…) and apologized sheepishly. They wanted to know what I was doing out there. Still buzzing from an incredible experience, I pulled out the camera and offered to show them. The three of us huddled in the wind with our heads close to the back of my Nikon’s LCD and looked through the entire image set frame by frame while dispatch ran my plates and ID. The officers have one of the best office views in the state out their front windshield and were excited to see my photographic interpretation of what they see every day. As it turns out we share mutual friends and a deep connection for preserving California’s wild coast. I didn’t get a ticket that night. Instead I walked away with a couple of new friends, some images with which I’m really happy, and the good info on where to park the car for my next outing.
-Jerry Dodrill
Sebastopol, CA
Visionary Wild instructor Jerry Dodrill will co-lead two workshops on the California coast with Jeff Foott in 2015, among the northern Redwood Coast in June and on the Sonoma Coast in September. We hope you can join us.
More info:
Bioluminescence: http://en.wikipedia.org/wiki/Bioluminescence
Sonoma Coast State Park: http://www.parks.ca.gov/?page_id=451
Pocket Light Meter App for iPhone
 My light meter of choice for close to two decades has been the Pentax Digital Spot. My first act when setting out into the landscape to photograph with my old 4×5 view camera was invariably to hang the pistol-gripped device around my neck. It went everywhere with me, and determining exposures with it, including filter factors, reciprocity failure of film, and camera bellows extension became second nature.
Though today’s digital cameras make hand-held meters unnecessary for most landscape photography, from time to time I still encounter situations when it would be handy to be able to take a meter reading independent of the camera. Incredibly, the iPhone delivers a solution that is very practical, effective, and free!
Nuwaste Studios has developed a spectacular light meter app for iPhones. It will read down to EV -1.78 and can be used to calculate accurate exposures longer than you would ever need (hundreds of hours). It can be calibrated as well if necessary, though in comparison to both my Pentax meter and my Nikon D700, it is right on the money. The correction factor comes in really handy, however, for film users who need to account for filter factors or reciprocity failure. In addition to shutter speed and aperture, it also reads out in EV, Lux, Foot Candles, and Cine shutter speeds. If this were a stand-alone digital light meter, it would cost $200 or more.
The next time I need to do an exposure longer than 30 seconds, or if I’ve got my camera all locked down on the tripod and don’t want to move it to take an in-camera meter reading, I’ll just grab my iPhone! –Justin Black
New Work: Jack Dykinga

Monsoon storm lightning strikes hillside silhouetted saguaro cactus, Carnegiea gigantea, Sonoran Desert National Monument, Arizona. © 2011 Jack Dykinga
Shooting lightning is easy. Finding a situation where an active lightning storm completes the composition is really hard. In order to get this image, I trailed and passed through the storm front, continually finding potential cactus subjects…only to reject them as the storm continued to push onward. Finally, I got far enough ahead to let the storm transition into my frame. Focusing became the hardest problem to overcome. Finally hung my headlamp on the tree and focused on the beam. Lots of very hard, wet work with no sleep! –Jack Dykinga
Technical details: 7.5 seconds @ f/9.0, ISO 100, Nikon D3X, Nikkor AF-S 70-300 VR, Really Right Stuff BH-55 ballhead, Really Right Stuff tripod
Photo Salon: The Value of Critique
by Justin Black
The lone-wolf photographer is a concept with which we are all familiar. Many of us like to think of ourselves as self-reliant and passionately free-spirited, driven only by an innate creative vision. In my experience, however, most of the people I know who have mastered anything haven’t done it on their own. They’ve done it through interaction with others.
One of the most important experiences in my formative years was in George Washington University’s small but excellent photography program, founded by a landscape photographer named Jerry Lake. Professor Lake treated his students like family and regularly joined us on weekend photography outings, an act of “above and beyond” generosity to be sure. Back in the studio, students and professors alike would regularly pin up prints in a common area and critique each others’ work. The atmosphere was open and supportive, and everyone felt free to share their work and honest opinions. We all benefitted tremendously from the process of peer review and constructive critique.

One of the many prints that benefitted from critique by my peers in the GWU Photo Dept. "Dawn at the confluence of the Potomac and Shenandoah Rivers, Harper's Ferry, West Virginia." © 1994 Justin Black
In the early days of my photography career, I began to miss the honest and constructive feedback of other photographers, so a friend invited me to participate in Photo Salon, an informal group of serious photographers who met each month at a photo studio outside Washington, DC. Work prints were spread across a huge table, everyone would circle around, look them over, ask questions, share impressions, and offer suggestions. Each of us would have the opportunity to say a little bit about what we were working on and what challenges we faced as we developed our body of work. There was a documentary photographer following the stories of cancer patients, a portraitist doing a book project on transvestites, a fellow who created beautiful abstracts in abandoned industrial sites, and my landscapes among several others. With so many different genres coming together in one place, we each left our comfort zone and benefitted from the insights of professional peers who were all sophisticated visual communicators despite coming from differing interests and backgrounds.
These experiences taught me the art of constructive critique that I regularly apply to this day as a workshop instructor, and they drove home the tremendous value of gathering with other serious photographers in a spirit of camaraderie to discuss aesthetics, themes, techniques, ethics, potential outlets and markets, and myriad other topics. As much as I value creative independence and cherish solitude when I can find it, it seems to me that engaging with a community of passionate and insightful peers is one of the most personally and artistically rewarding activities any photographer can undertake. It is with this knowledge that I look forward eagerly to every workshop critique session and the happy déjà vu experienced every time a participant tells me that they learned far more from the critiques than they ever imagined possible. I have indeed been there before.